How do I get to alert screen?
Please click on your user name to reveal a drop-down menu.
You will see an option called Create Alerts in the drop-down menu. Selecting this option will open Alert screen in a new browser tab.
Alert Screen: Nuts and Bolts
The alert function allows you to create an alert query which is just like an advanced search query. The query is saved in our database. Whenever, we see any new ad(s) that matches your alert query, we store the data on the alert screen and notify you via email (if you opted in). Let's first take a look at the user interface of the alert screen as shown below:
Alert Screen
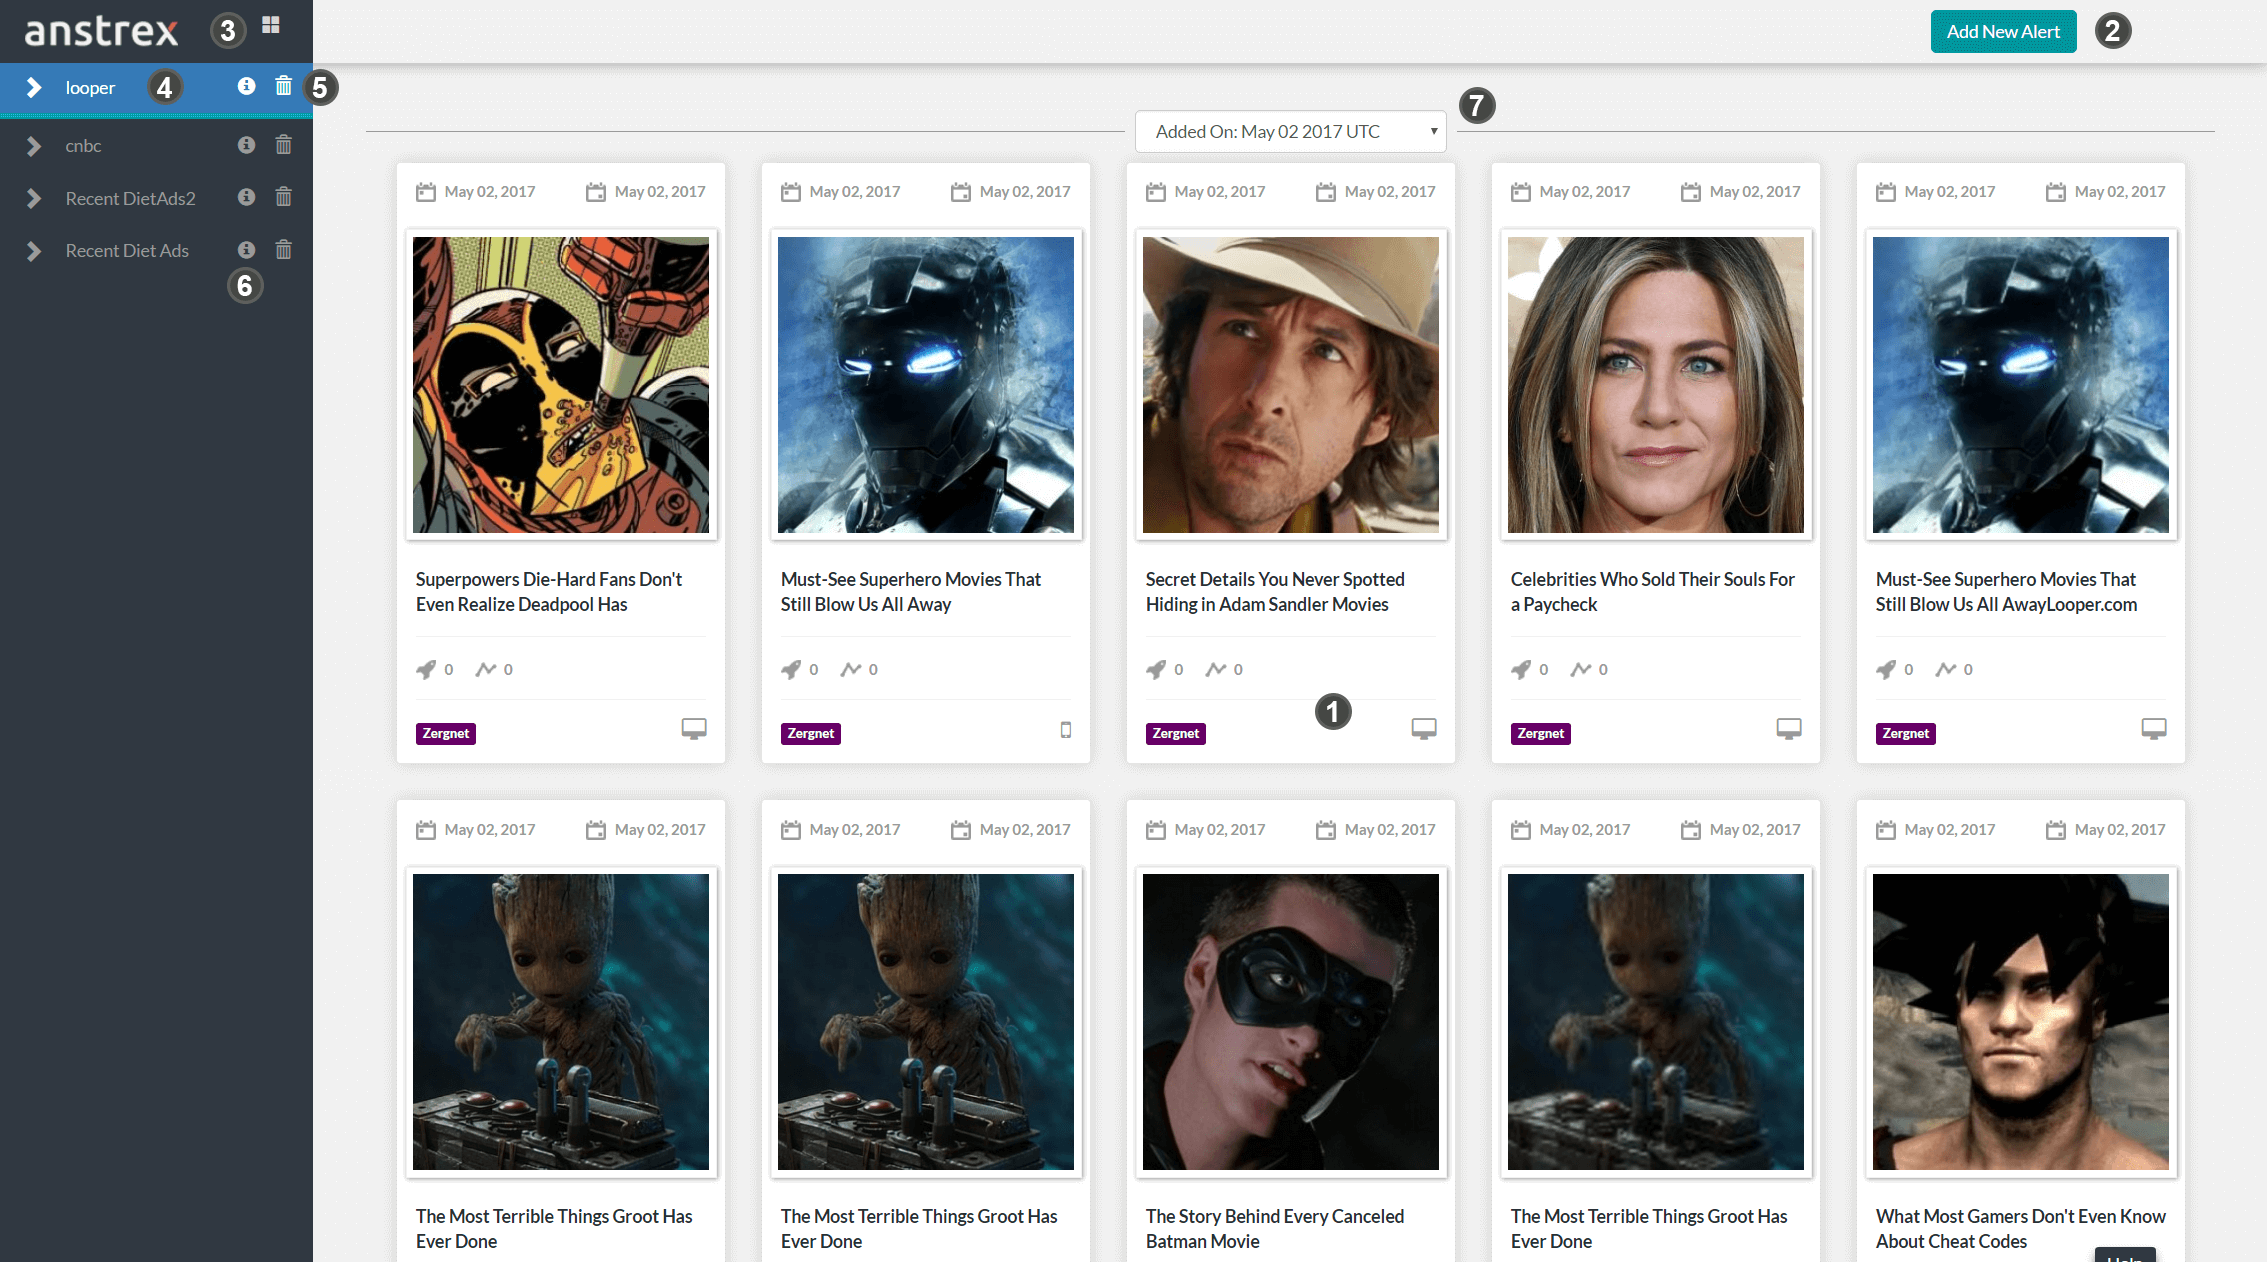
Here are the essential elements of the alert screen as labelled in the figure above:
- Alert Screen Listing Area - Here you will see all the ads for a given query
- Add New Alert Button - This button allows you to create new alerts
- Sidebar Toggle - This toggle button will collapse/expand the sidebar.
- Alert List - The sidebar shows list of alerts you have created. Clicking on any alert name will display the ads for the corresponding alert
- Trash Icon () - Clicking on this icon will delete your alert after confirmation
- Info Icon () - Clicking on this icon will open the alert dialog box for you to make edits
- Date Dropdown - This dropdown displays the date on which the ads were observed. The most recently collected ads are shown at the top. If you want to look at the past 7 day history, you can do so by using this dropdown
Create New Alert From Scratch
To create a new alert, follow these steps:
- Click on Add New Alert turquoise colored button on the right hand top corner of the screen
- This will open a dialog box as a modal
- Since building the alert query is same as building advanced search query, we would refer you to advanced search query builder article for this step
- After you build your alert query, provide a email notification frequency. You have following 3 choices
- Once per day (default and recommended if you don't want to get inundated with too many emails)
- Multiple emails (This option will send you multiple emails as and when we find the matching creatives. Use this option only if you want to be notified in shortest timespan)
- Never (You will not receive any notification but your alerts will be active and you can check them when you login)
- Now it is time to give a meaningful name to your alert query and click on Save button.
- Your alert will be created and saved. It should now appear on the sidebar
- Now wait for the new creatives to appear. Please note that this can take a few hours at minimum. If your query is too broad, we will only collect first 50 ads per day. If your query is too narrow, you may not see any ads appear for days.
Here is the video that shows the process:
Create New Alert From Saved Search
As mentioned earlier, alert query is essentially same as an advanced search query. You, therefore, can use your advanced search queries to be used for alerts. Here is how to do it:
- Click on Add New Alert turquoise colored button on the right hand top corner of the screen
- This will open a dialog box as a modal
- On the modal click on the dropdown in the section titled Load Your Saved Search. The dropdown will reveal all the saved search queries.
- Select the desired search query. The form will get auto populated.
- If you wish to save it with a different name, type a name and then click on the Save button. If you don't wish to give a different name, click on the Save button and your alert will be saved with the same name as the search query.
- Your alert will be created and saved. It should now appear on the sidebar
- Now wait for the new creatives to appear. Please note that this can take a few hours at minimum. If your query is too broad, we will only collect first 50 ads per day. If your query is too narrow, you may not see any ads appear for days.
Here is the video that shows the process:
Delete An Alert
Deleting an alert is super easy. Click on the trash can icon () next to the alert you want to delete. You will be required to confirm your delete operation. After you confirm, your alert will disappear from the sidebar and deleted. Please note that once you delete an alert, the entire history will be lost and there is no way to undelete this information.
Here is the video that shows the process:
Edit An Existing Alert
Please note that you cannot edit any query fields in an existing alert. You can only edit the email notification frequency
To edit an existing alert, click on the info icon (). This will open the dialog box where you can edit the email preferences. There is no need to save
Here is the video that shows the process:
If you wish to edit the query fields of an existing alert, you have to create a new alert and delete the old one.
Notification Preferences
There are 3 options as far as notification preference is concerned as shown in the screenshot below:
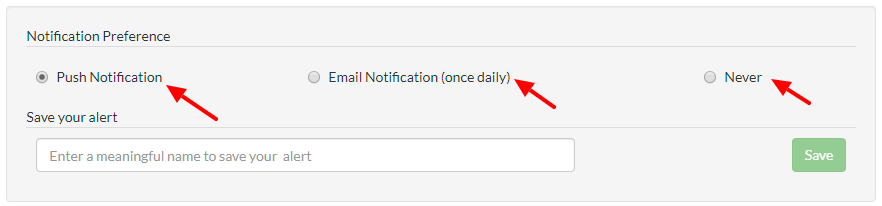
- Push Notification: This is the default option which relies on Chrome browser's push notification function. Selecting this option will generate additional prompt to subscribe to the particular topic and you will see a notification on your PC when a new alert is generated. This is by far the fastest way to get notified about an alert. Please note that this function is only tested on the Chrome browser. Other browsers are not supported at this point.
- Email Notification: This will generate an email once every day if an alert is generated. You will get notified by email. If you don't wish to receive emails, you can either unsubscribe using the link provided in the email or changing the preference in the notification section of the alert or deleting the alert.
- Never: This will not provide you with any notification should an alert be generated. However, you can still come to the alert section of the site and see new creatives that match your alert criteria.