Step By Step Instructions with Screenshots
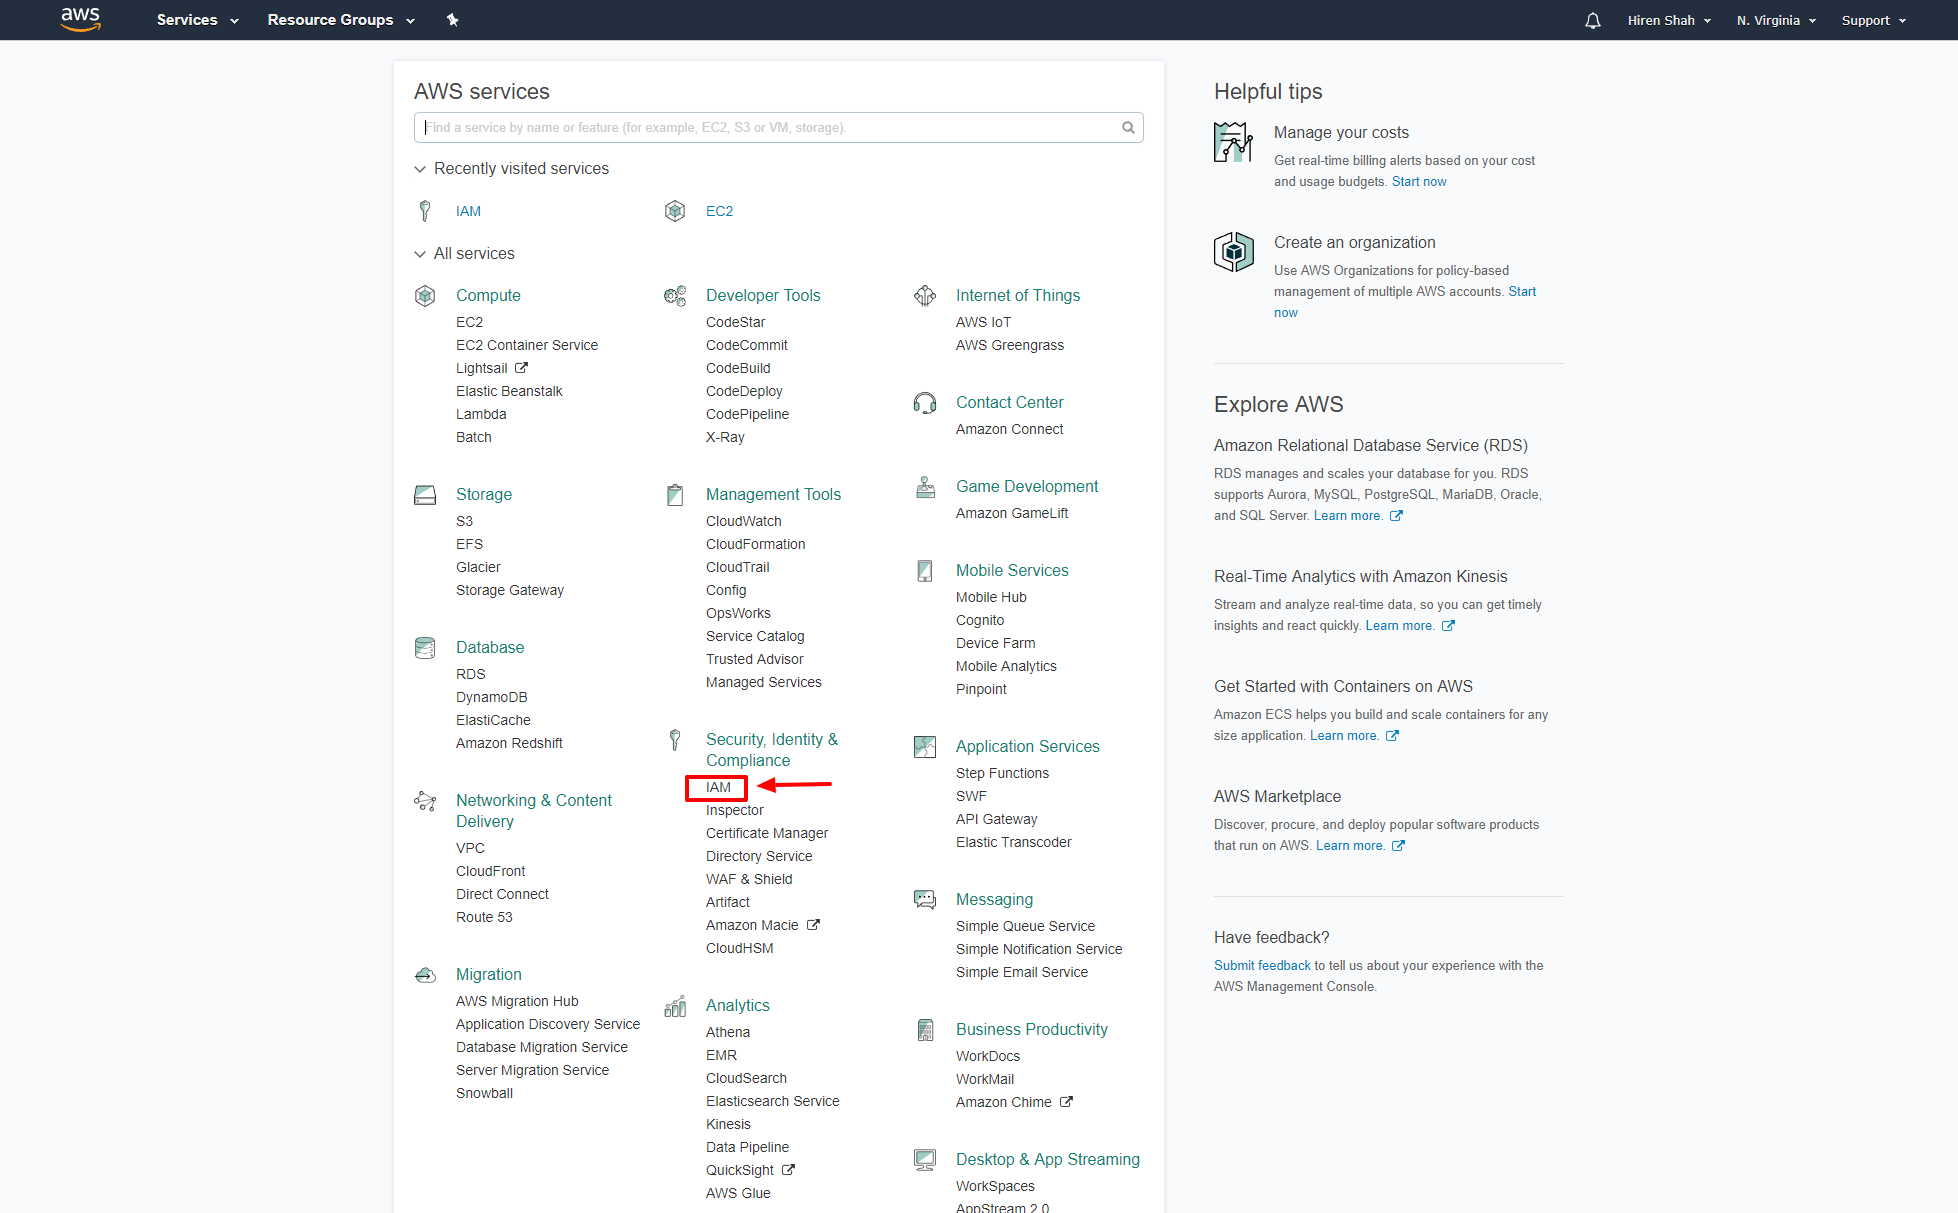
- Login to your AWS console and select IAM
- Select USERS from the left hand panel

- Select ADD USER from the top button bar

- Give your new user a name and provide Programmatic Access to this user as shown in the following screenshot. Select Next: Permissions button.

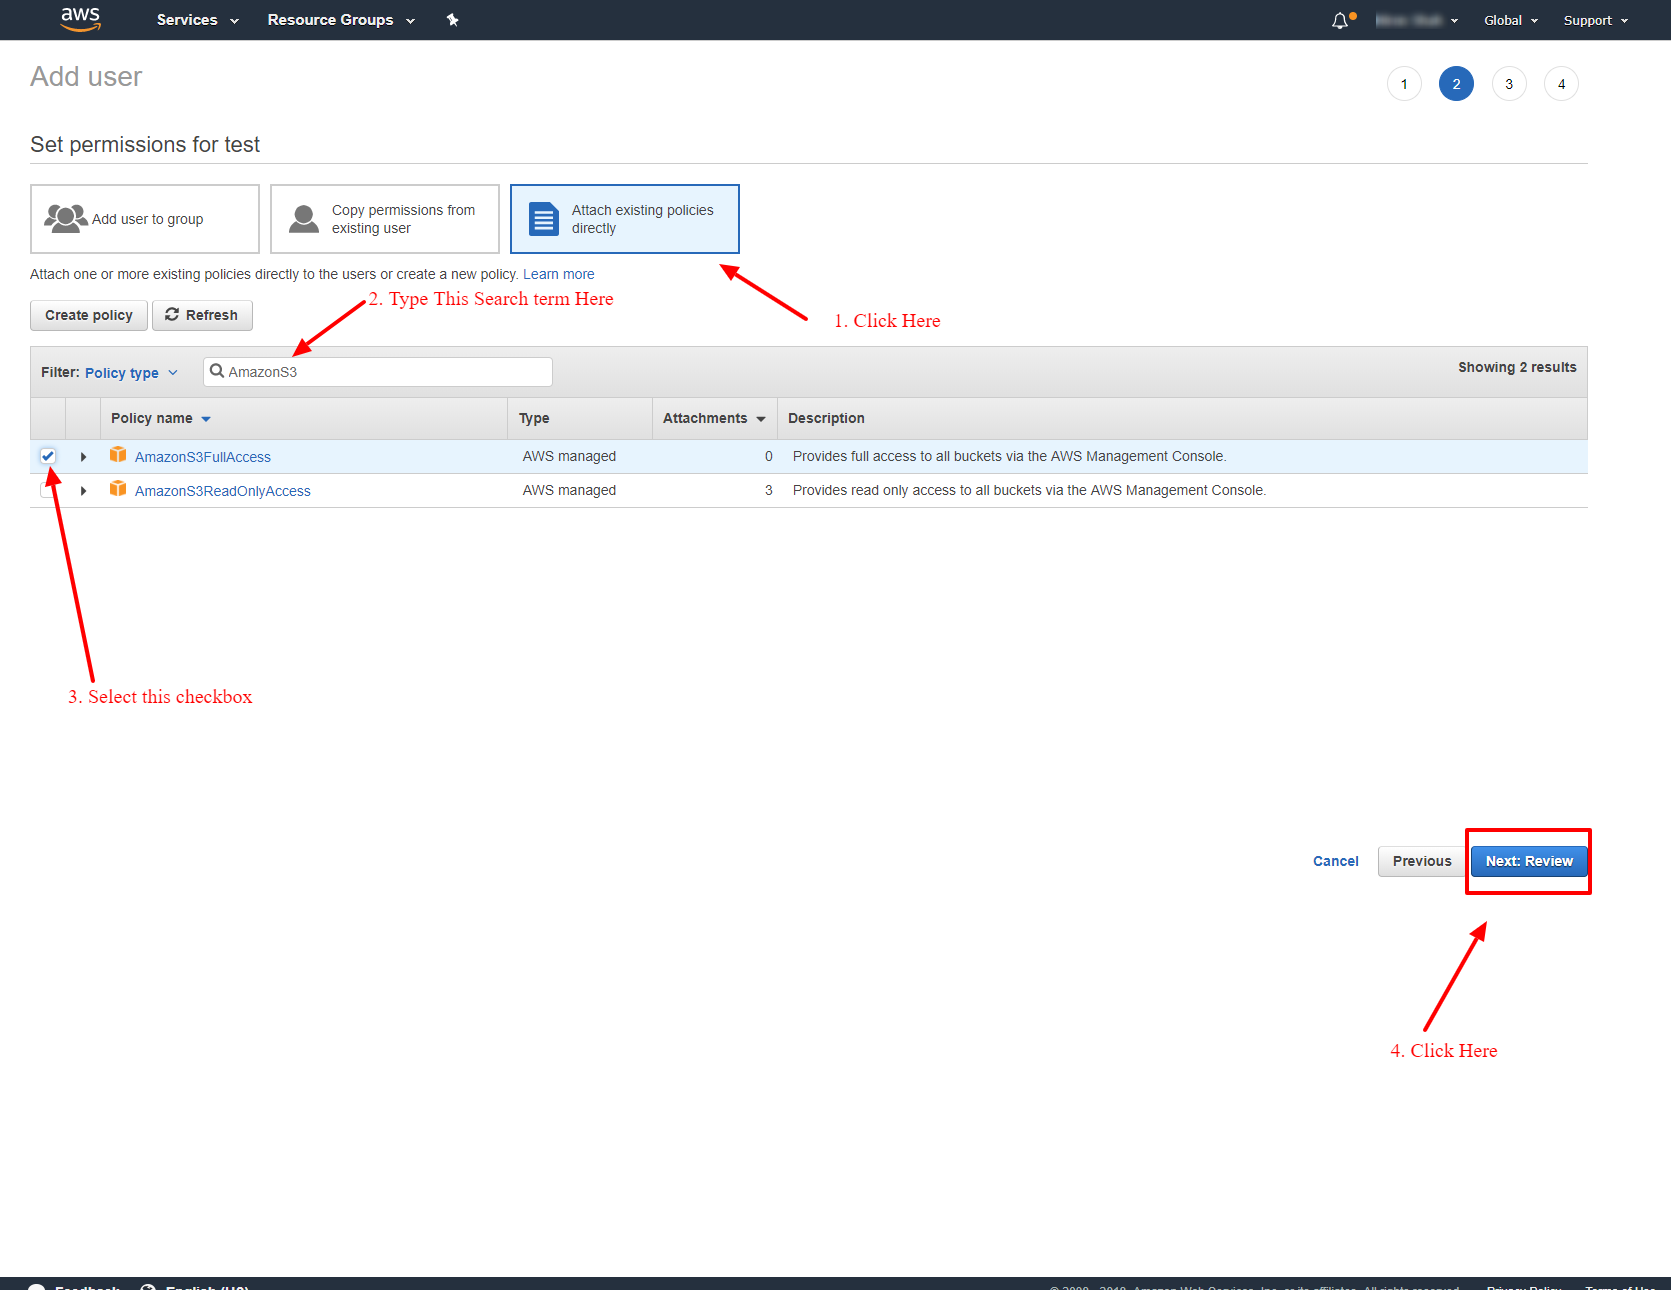
- Now we need to give this user access to your S3 bucket. Select Attach Existing Policies Directly option and type the search term AmazonS3. You should see some predefined policies here. Select AmazonS3FullAccess as shown in the figure below. Then click the button labelled Next:Review
- On the next screen review the information and make sure everything looks good as shown in the screenshot below. Your selected username should show up and the policy should read AmazonS3FullAccess

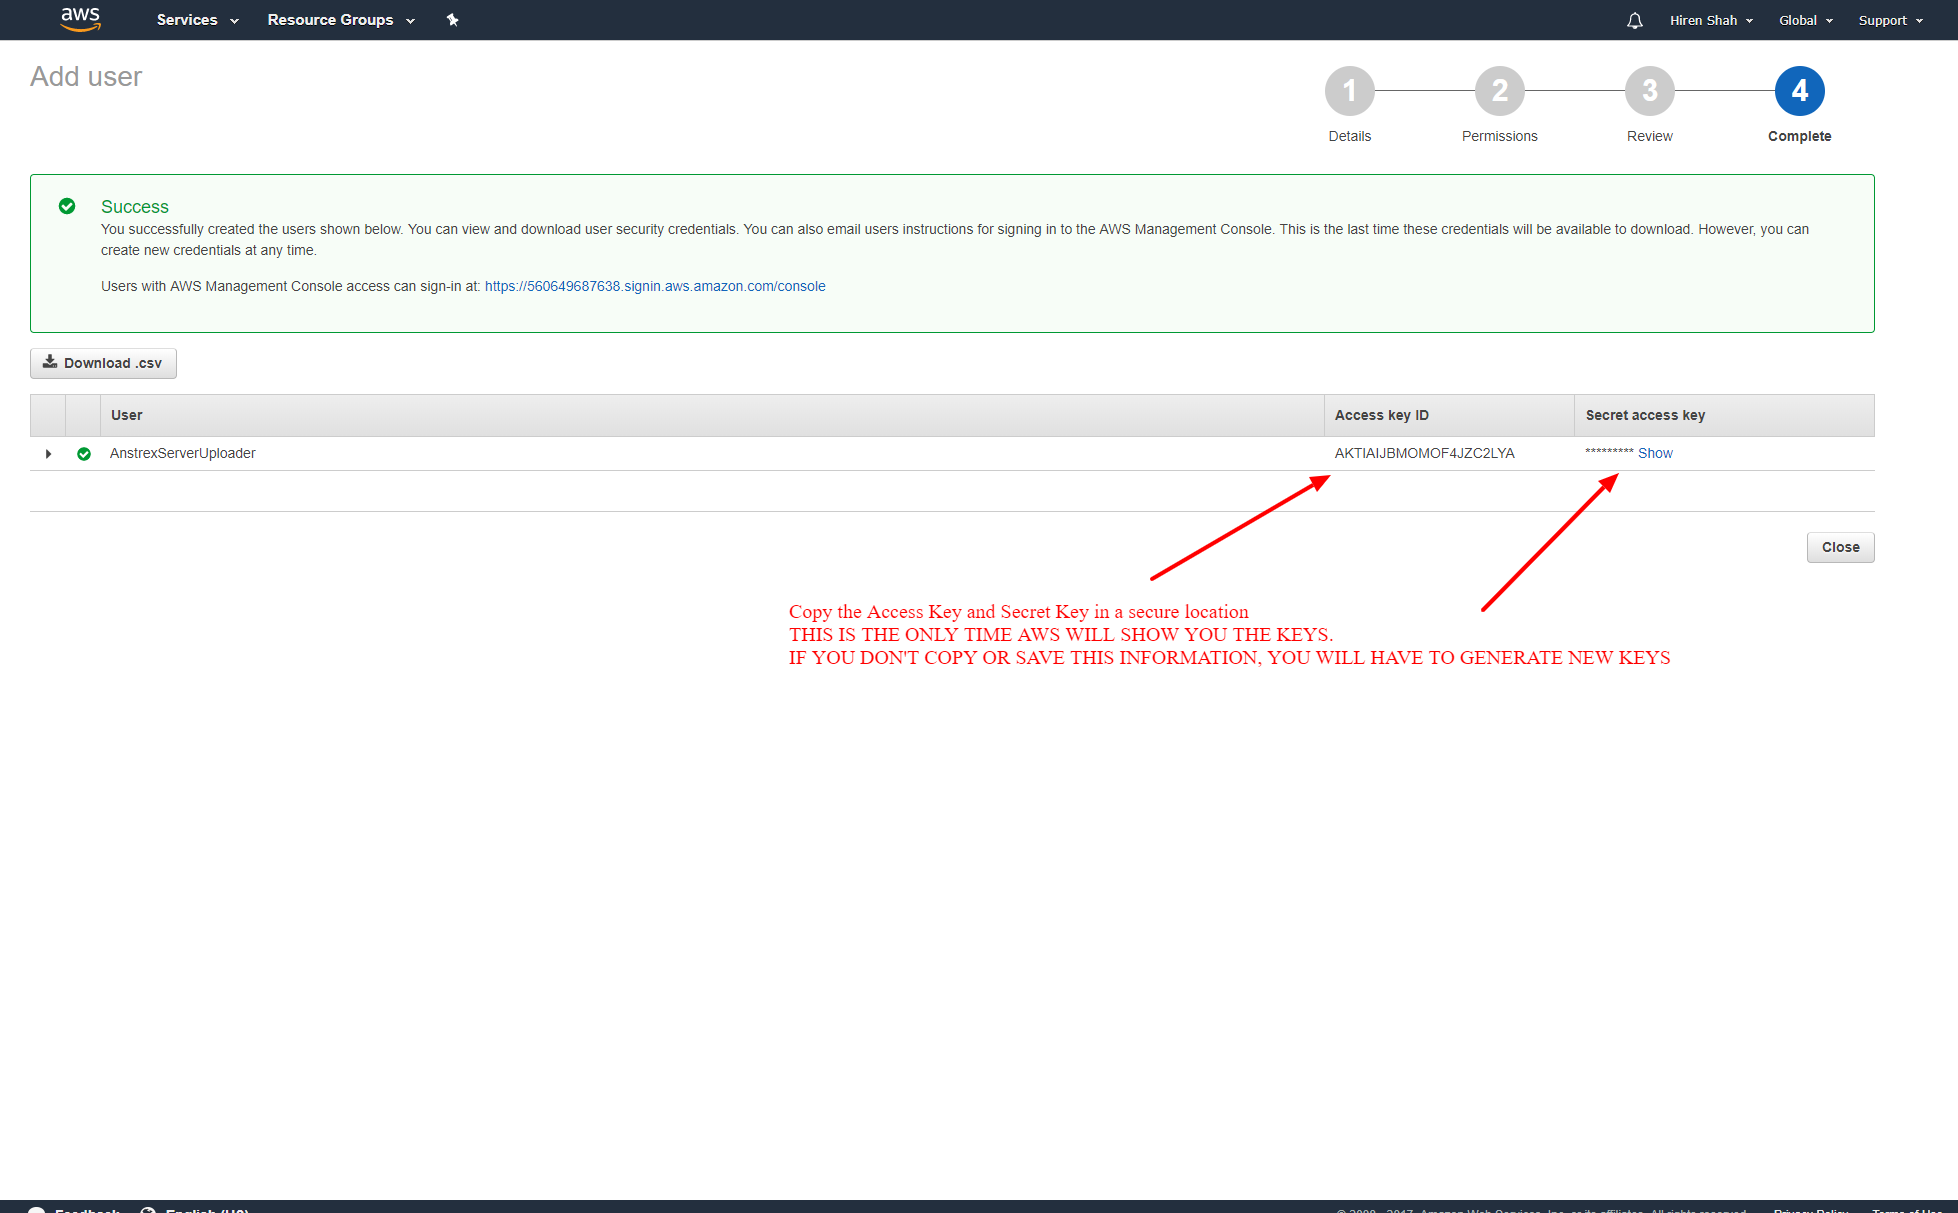
- The user is now created. Save and copy the Access ID and Secret Key in a secure location on your pc. Remember that you will see this information only one time. AWS will not show you the keys ever again. If you lose this information, you will have to generate a new set of keys and invalidate the lost keys (for security reasons).
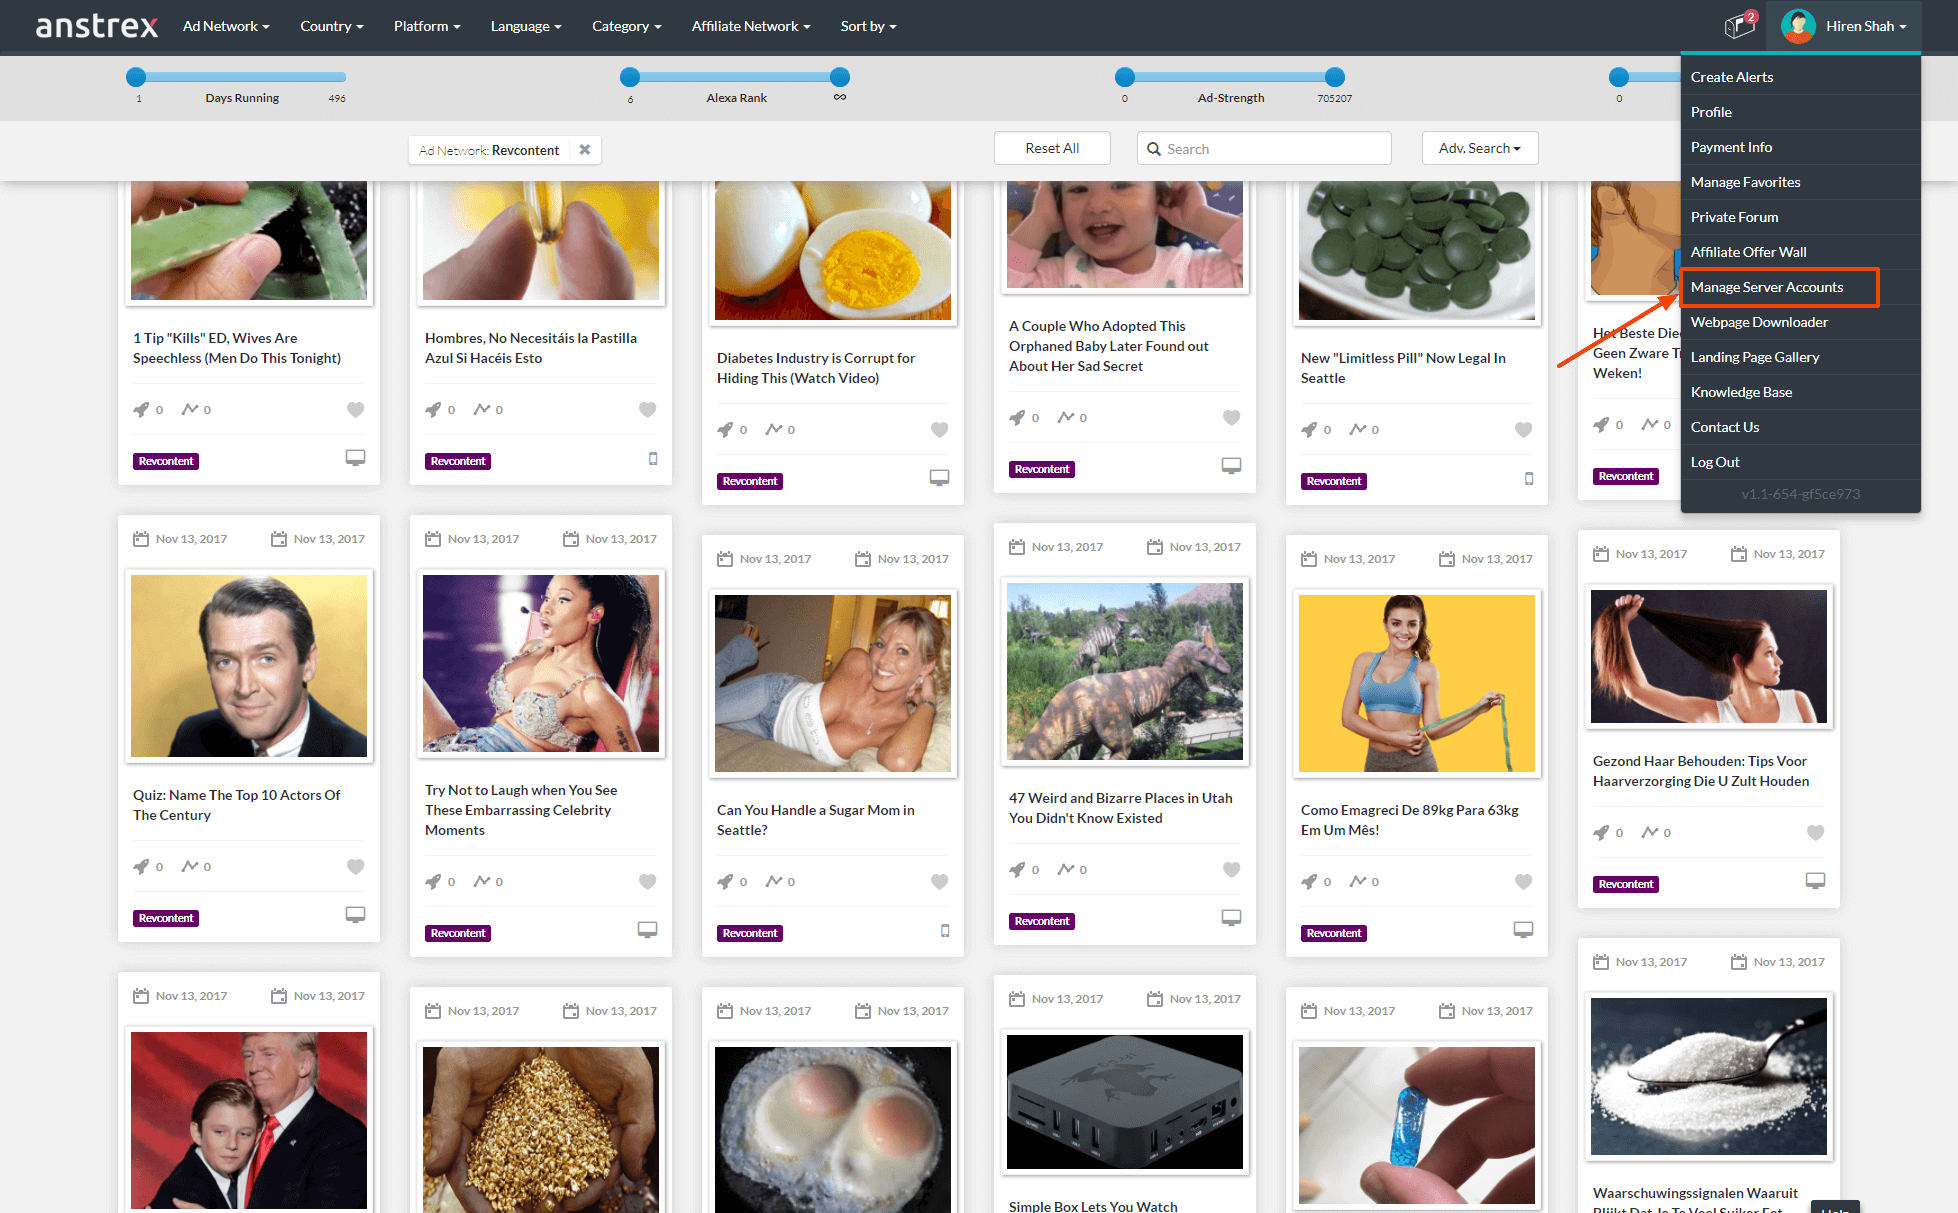
- Next steps involve importing these keys into the Anstrex platform. Select Manage Server Accounts from the drop down menu under your user name.
- Click on Add A New Account button

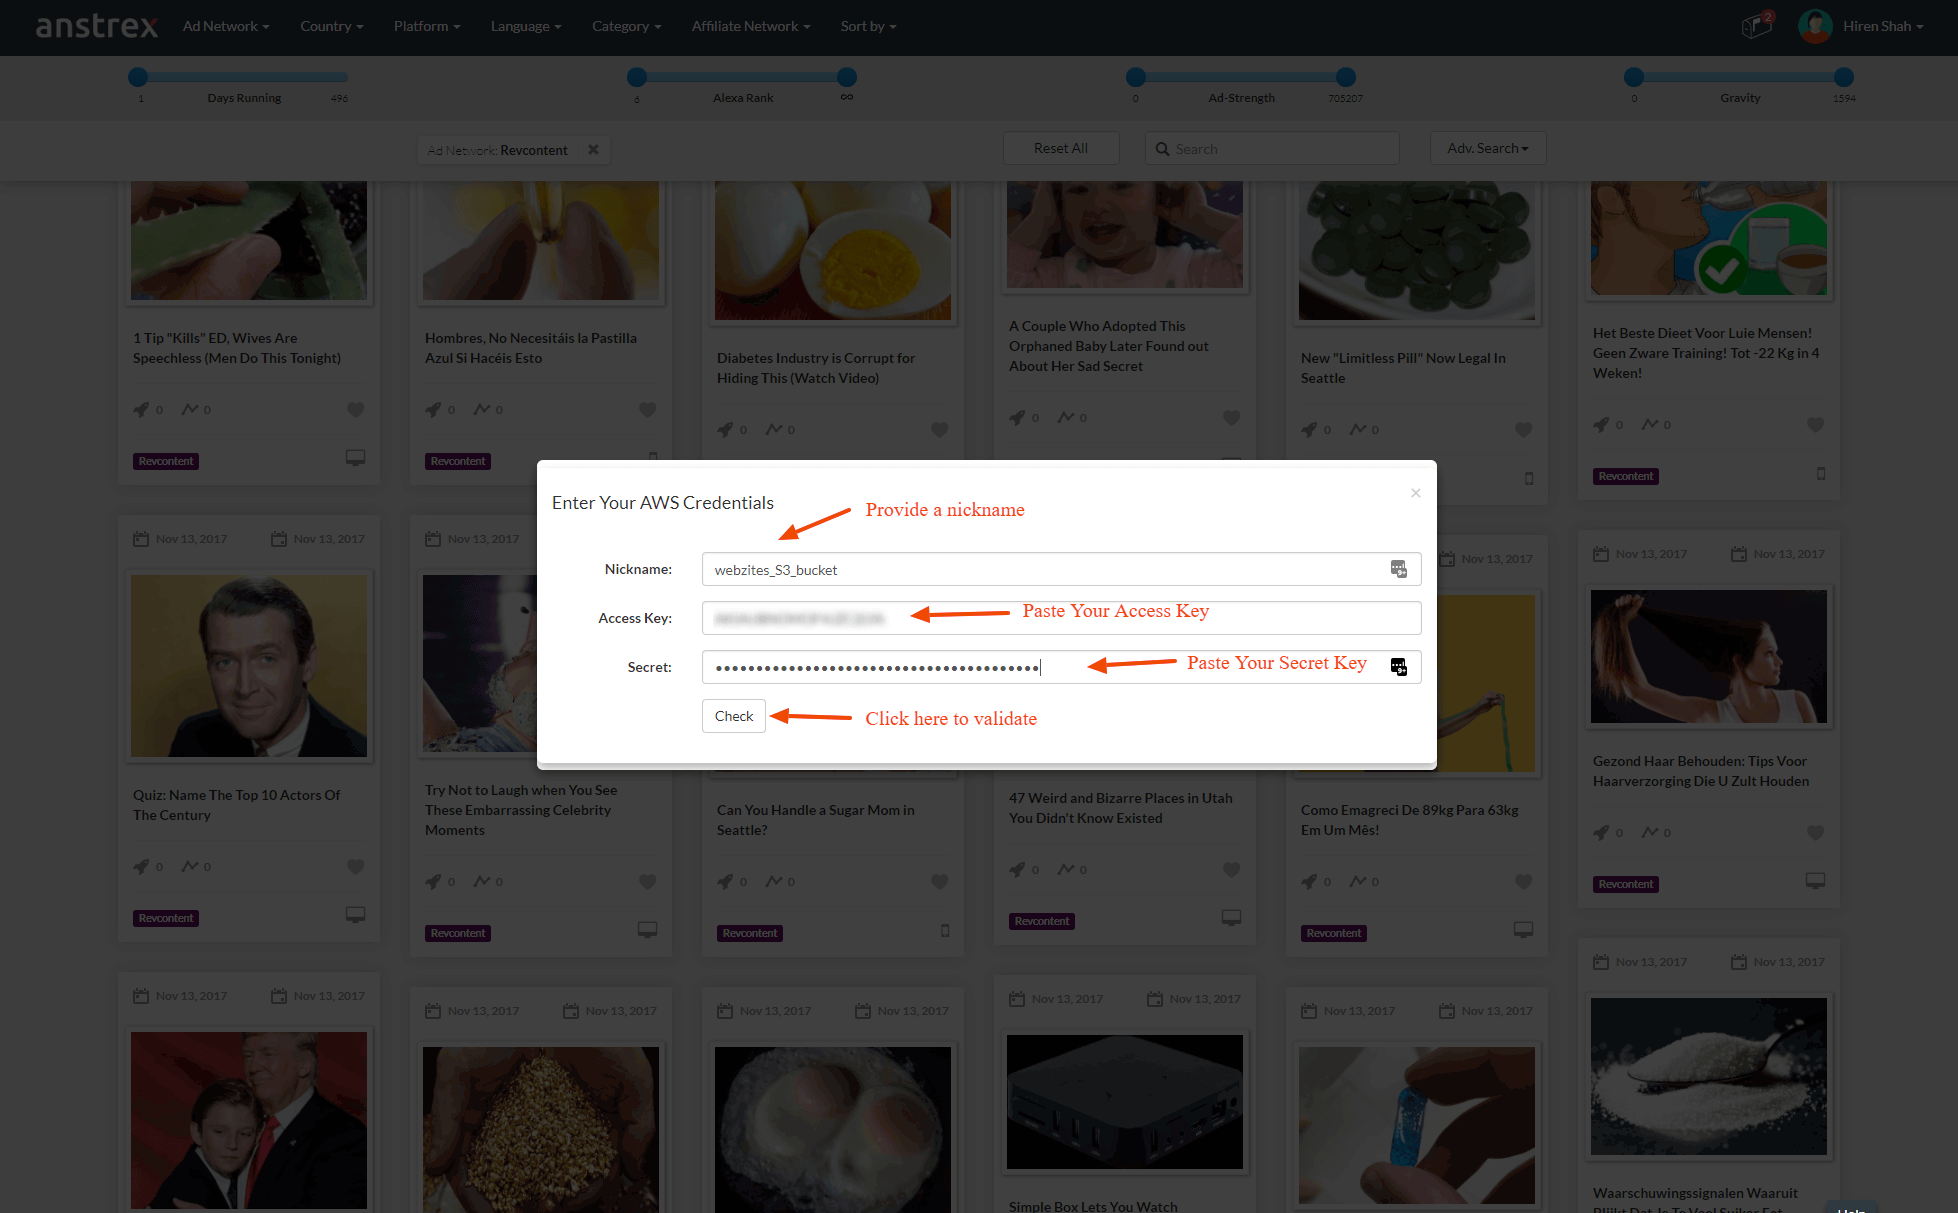
- Give your new account a nickname. Copy and paste the credentials from STEP 11 as shown below. Check the credentials by clicking on the button
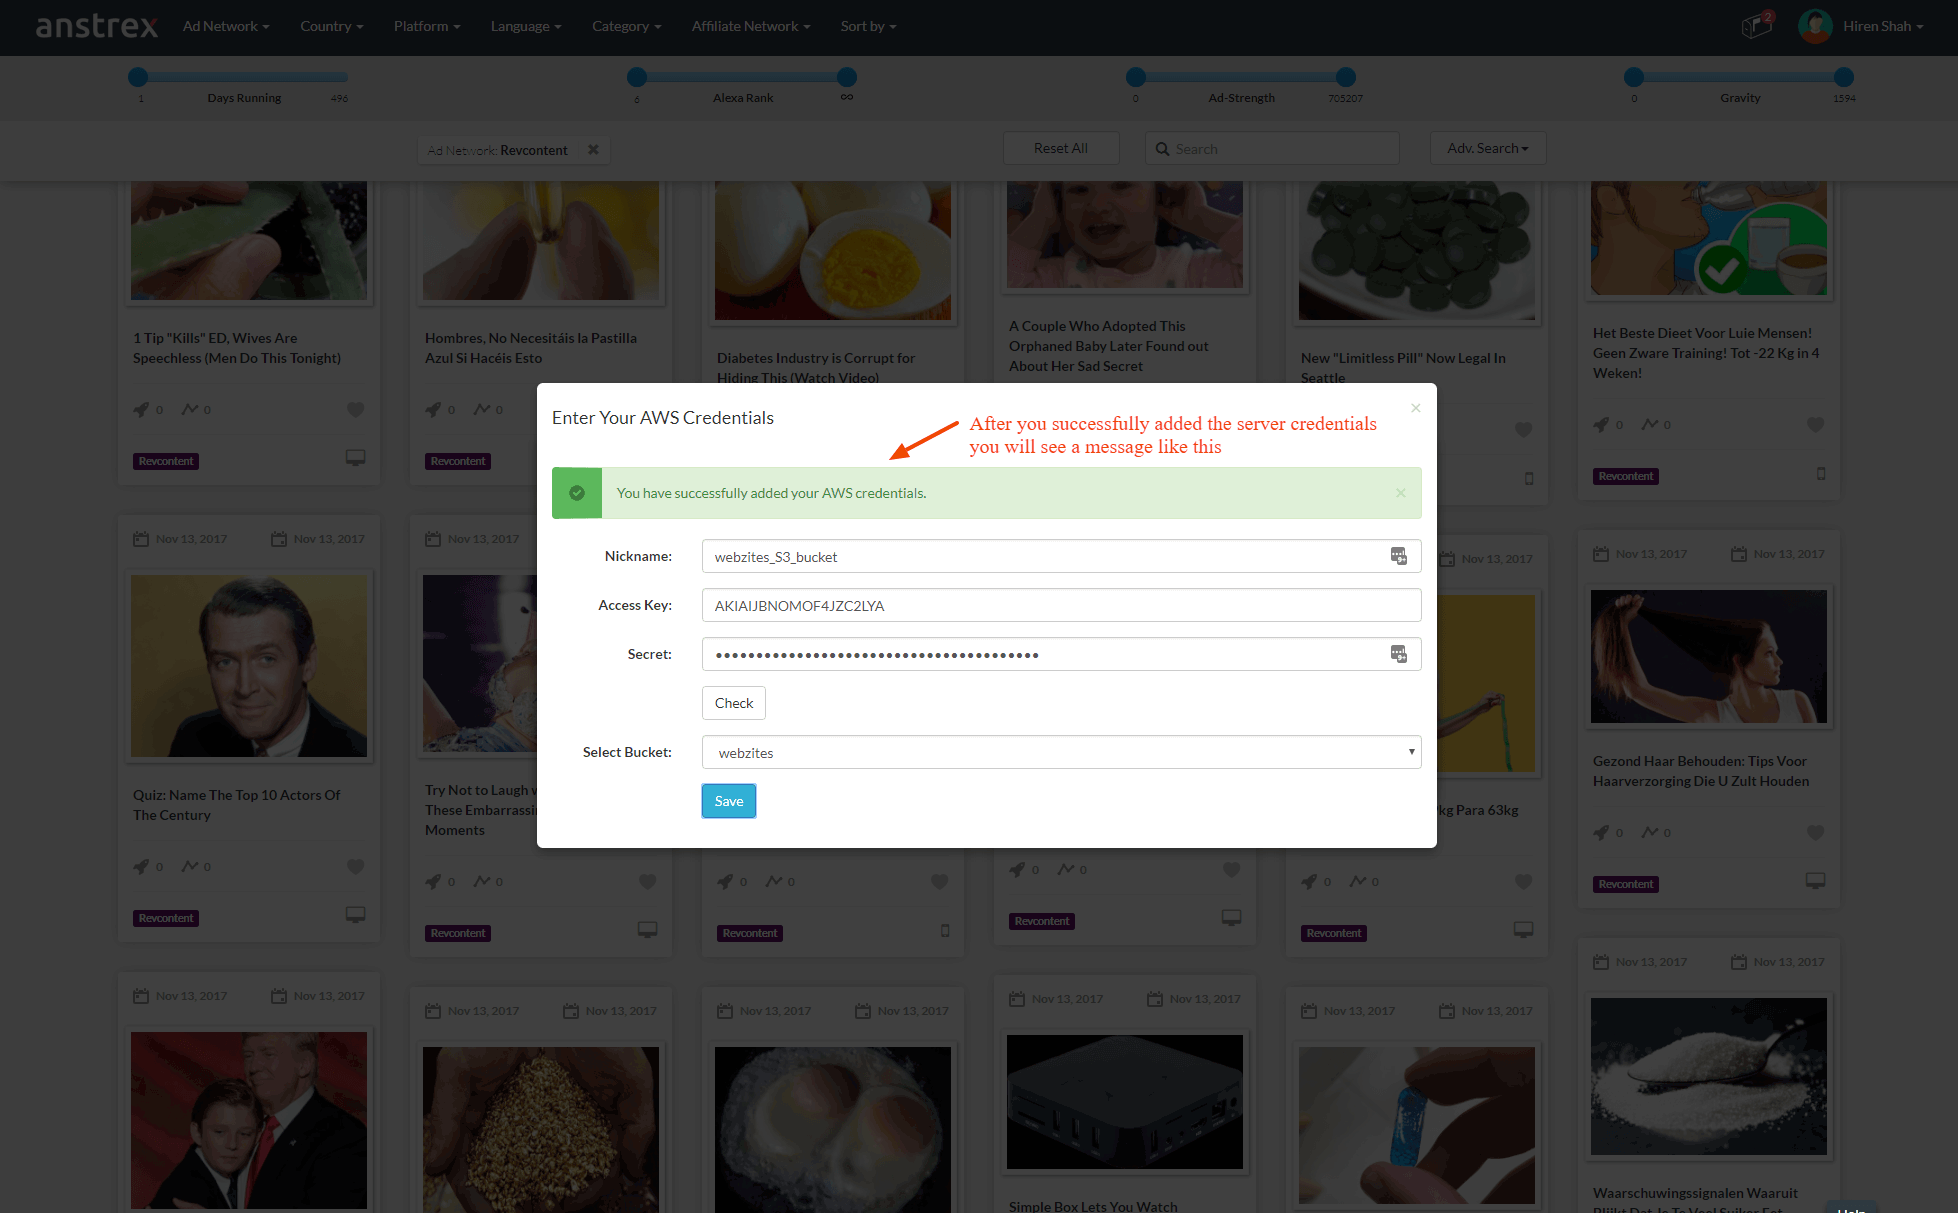
- If the credentials are valid, you will see a success message on the top. Now, select the bucket that you would like to upload to from the drop down. Remember, these credentials allow us only to list all the buckets but full read/write access to only buckets that were listed on your policy. So, if you don't select the correct bucket, the files cannot be uploaded. Click on the save button to save your credentials.

- Once the credentials have been saved, you should see a success message as shown below. You can now close the overlay.
- Now you will see your account listed. It is now ready for uploading landing pages.

Remember that you can create as many accounts as you want. You can point each account to a different bucket to quickly upload appropriate landing page to the bucket of your choice.