The Download & Deploy functionality consists of following main steps:
- Step 1: Download the page and other resources (images, js, css) from the server
- Step 2: Edit and customize the page using our inline full WYSIWYG HTML editor
- Step 3: Optimize the page (minify the images, html, javascript and css) to allow faster loading
- Step 4: Finally download the optimized page for self uploading to your server or use our in built tool to directly upload on your server
Let's look at each step in detail.
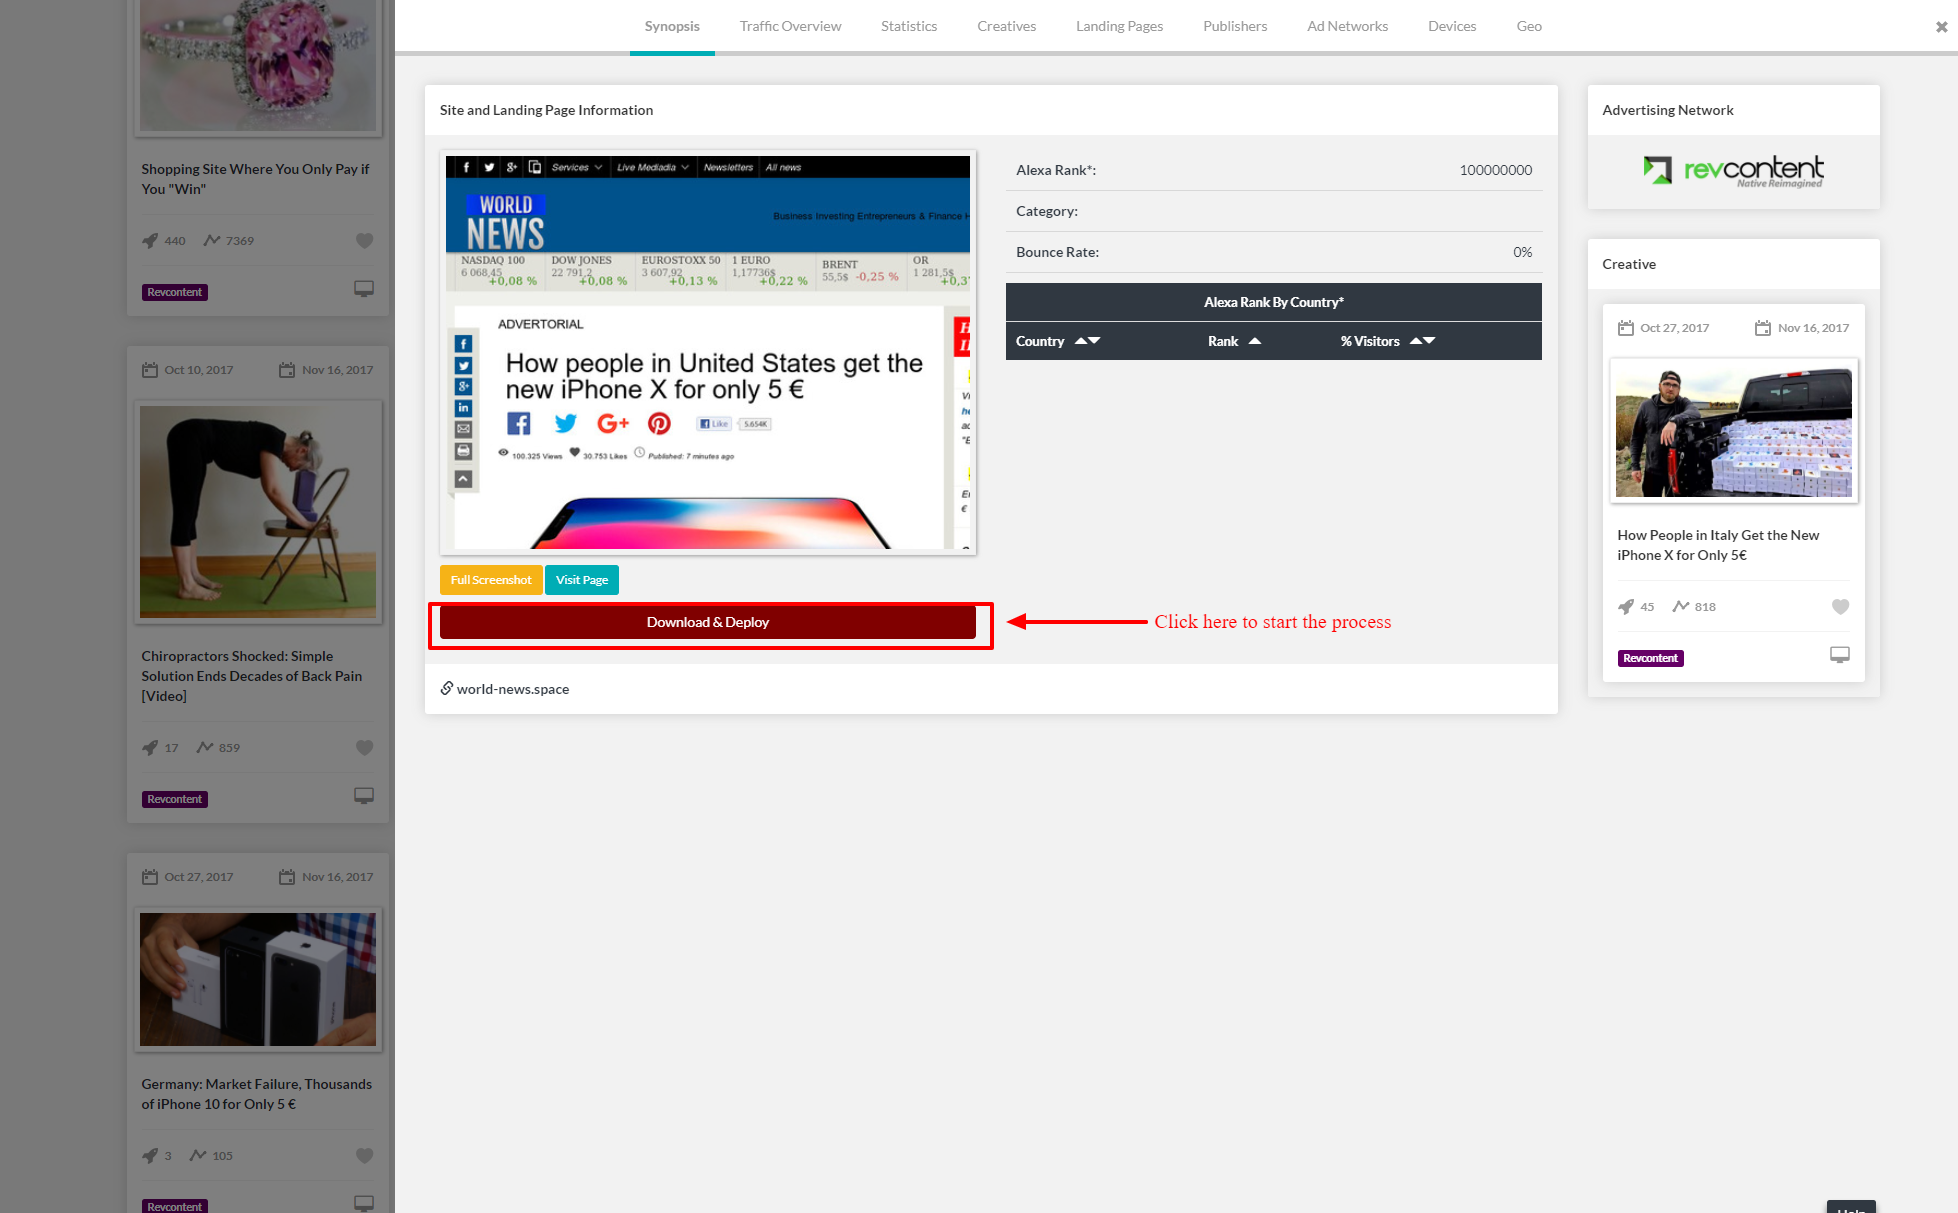
- Find the page that you would like to download. Click on Download & Deploy button on the Synopsis tab to begin the download process.
- You will see a modal that gives you an option to change the URL (useful if you want to download a page that is not listed on our site) and use a residential proxy if you believe that page is cloaked. If you chose the residential proxy option, the download may be slow depending on the speed of the proxy server. It is normally recommended not to use this option. Click OK button to begin download.

- After you click OK button, your download will begin immediately in background. You don't need to monitor the download. You can continue to browse or find more pages. If you wish to look at the download queue and progress you can click on the link shown in the screenshot below

- Alternatively, if you want to look at the downloads at your own convenience, you can select Webpage Downloader entry from the drop down menu under your user name as shown below

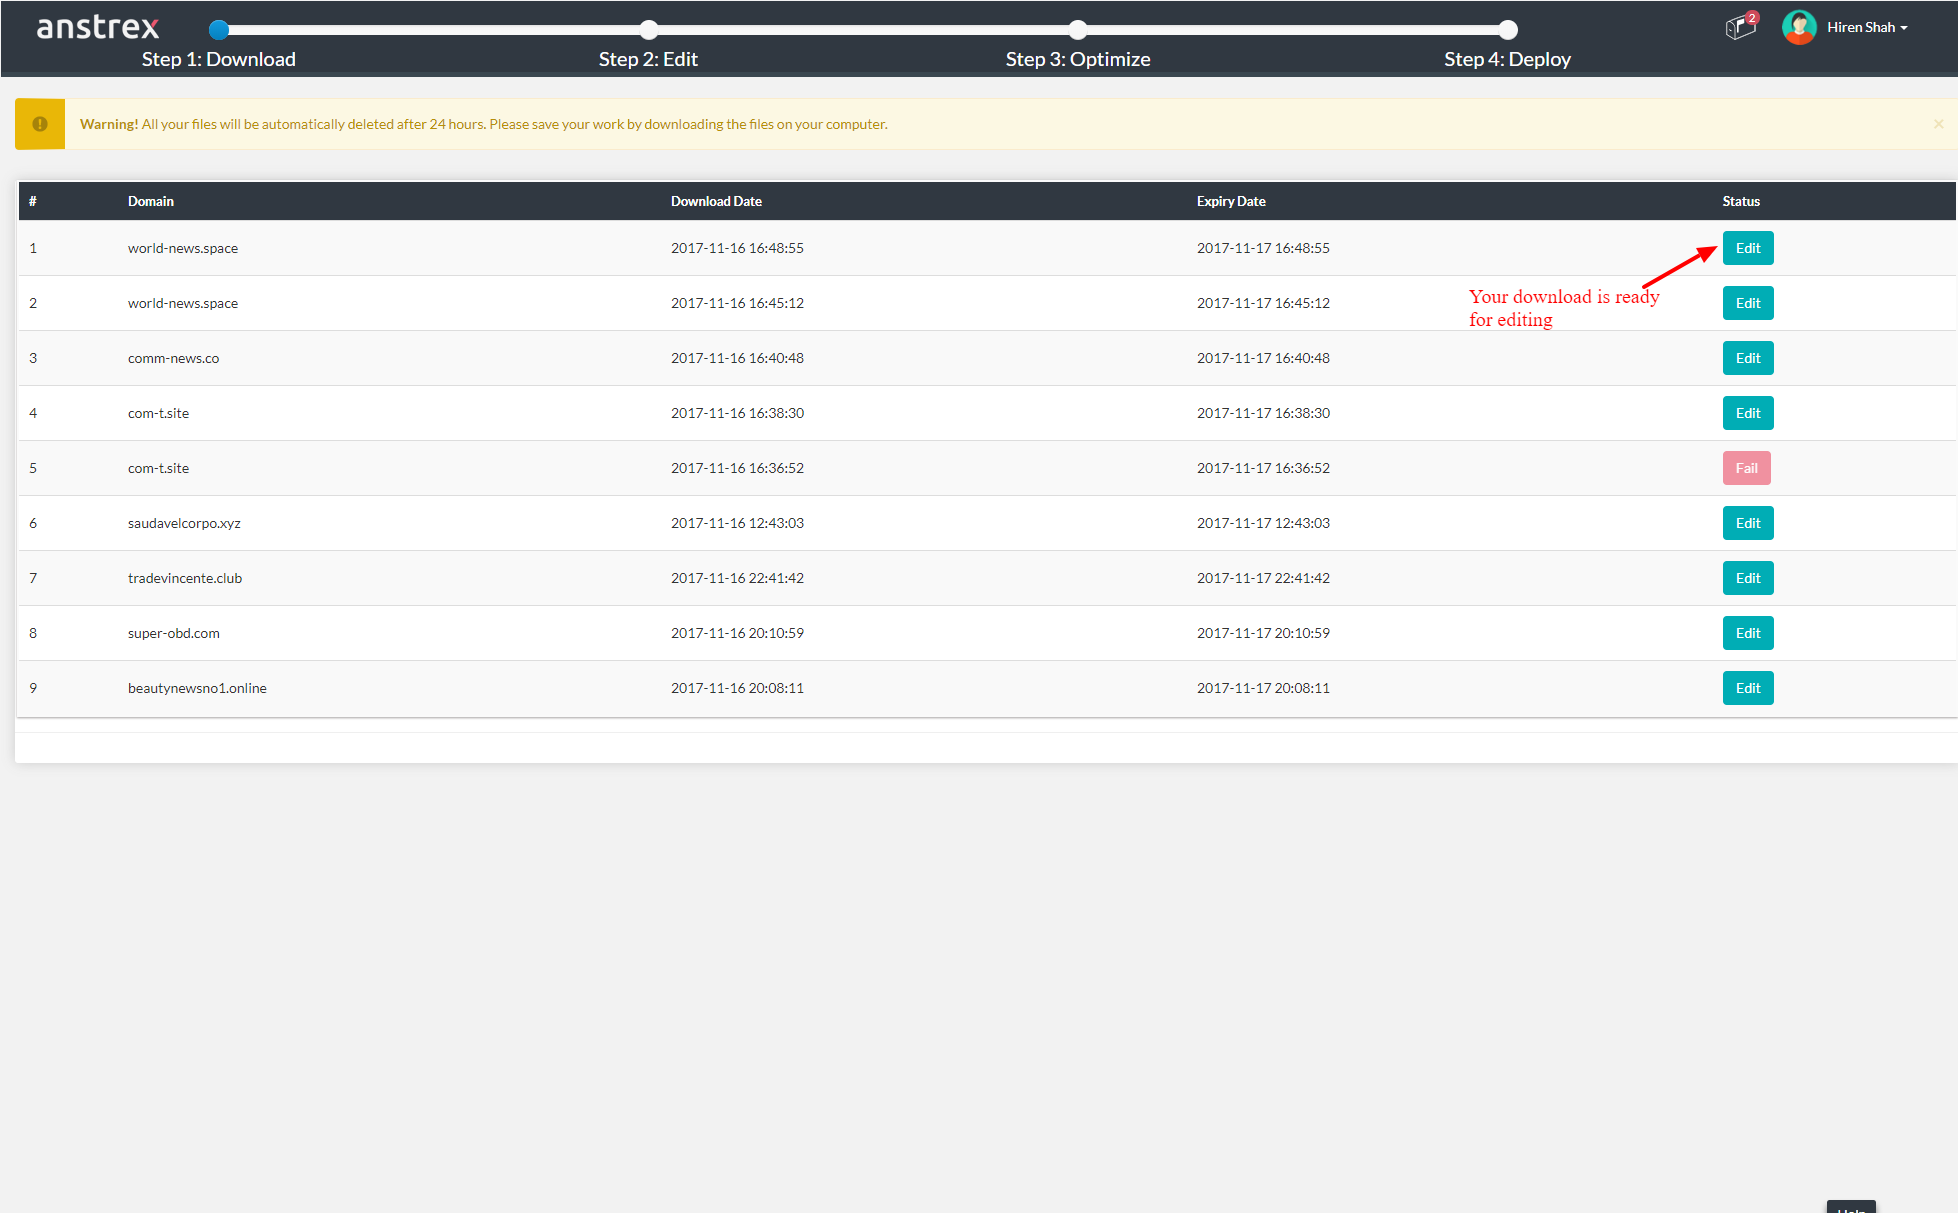
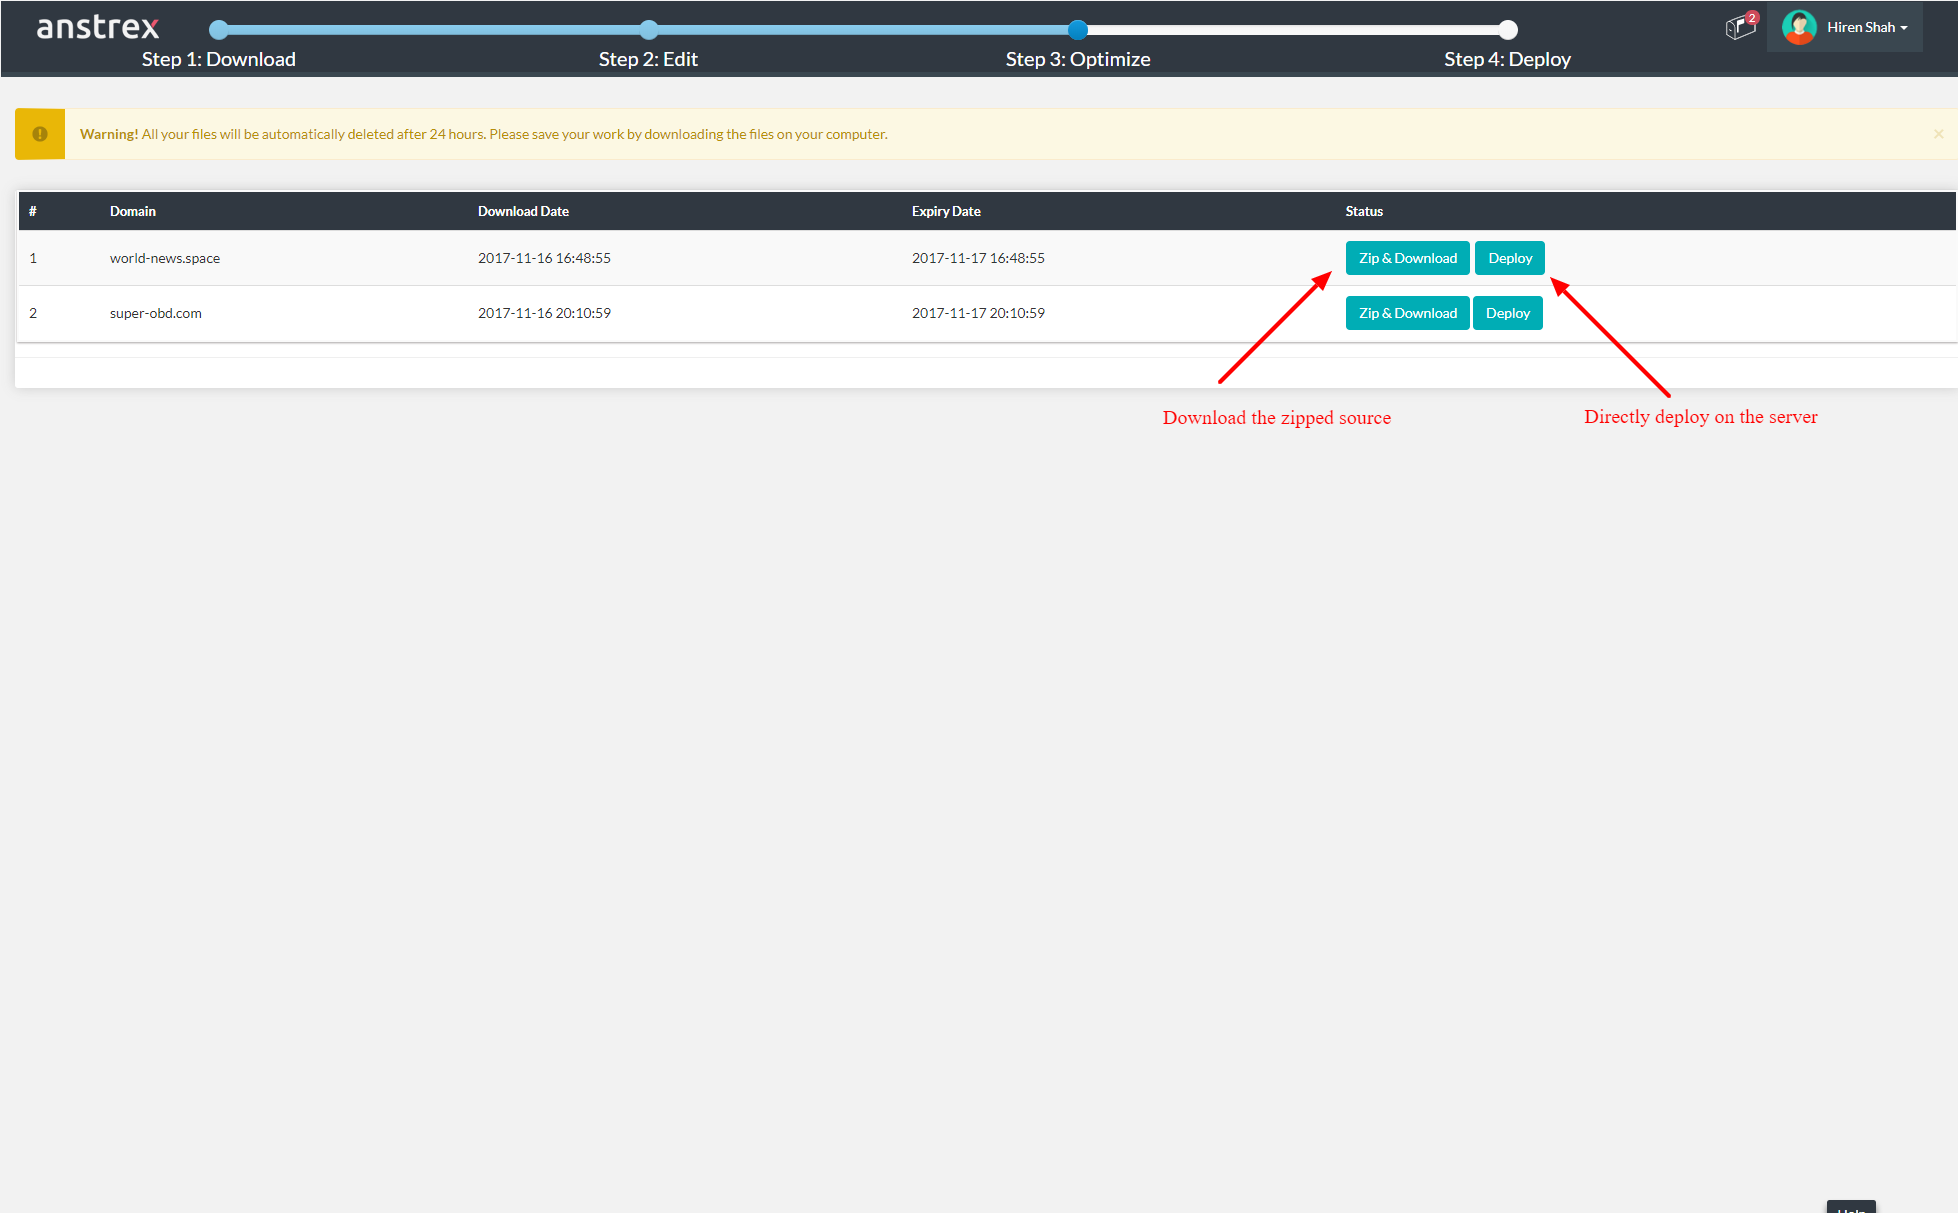
- The downloader page will show you the current status of all the queued downloads. The items on this screen are arranged chronologically with the latest downloads at the top of the list. Each download has a time-stamp. All the downloads will expire after 24 hours and will be deleted automatically. It is recommended that if you edited and customized your page that you download a copy of the page within 24 hour window.
- You will now be taken to our edit page. We have full featured WYSIWYG HTML editor. You have a number of functions to quickly edit the HTML code. Feel free to edit the text, hyperlinks, images and anything else.

- If you are a power user, well-versed with HTML, you can use our source code editor function to directly edit the HTML code. It is also a good idea to remove third party tracking and analytics scripts using source code editor.

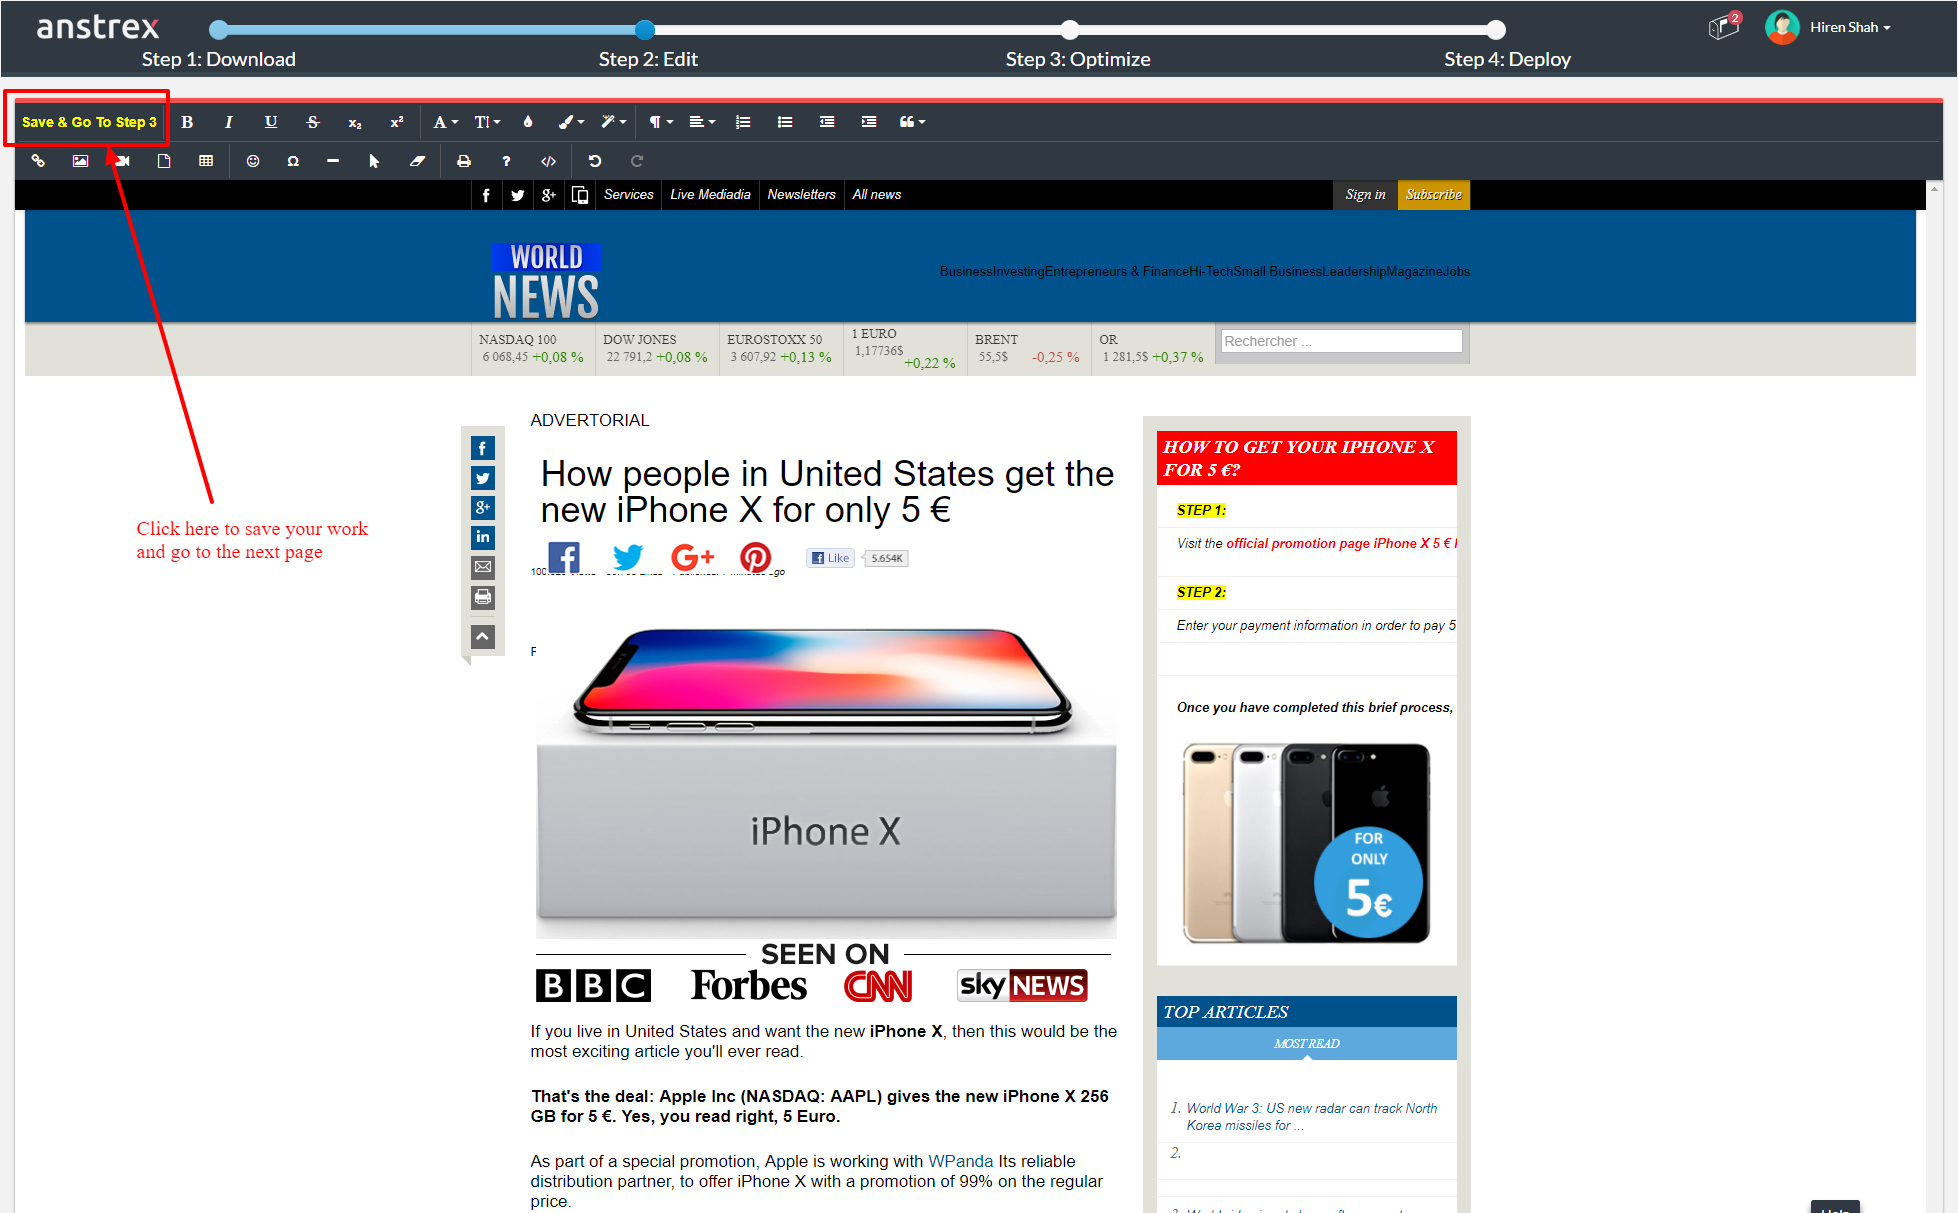
- After you are done with editing and customization, click on the Save & Go To Step 3 button to save your changes. Please note that we have an auto save function enabled that will periodically save your changes should your browser crash.
- You will now see a modal with various optimization options. It is recommended to select all the options since it will help to load your page faster.

- The optimization will take a minute or more to complete depending on the size of the page and number of images.

- After the optimization is complete, you will have the option to either download the web page as a single zip file or upload it to the server.
- If you select Deploy option, you will be prompted with a modal. On this modal you can select your desired server from the drop down menu. If you don't know how to link your server account to Anstrex, please refer to this article. You can optionally create a sub-folder on your server, if you wish to upload the files in a sub-folder.

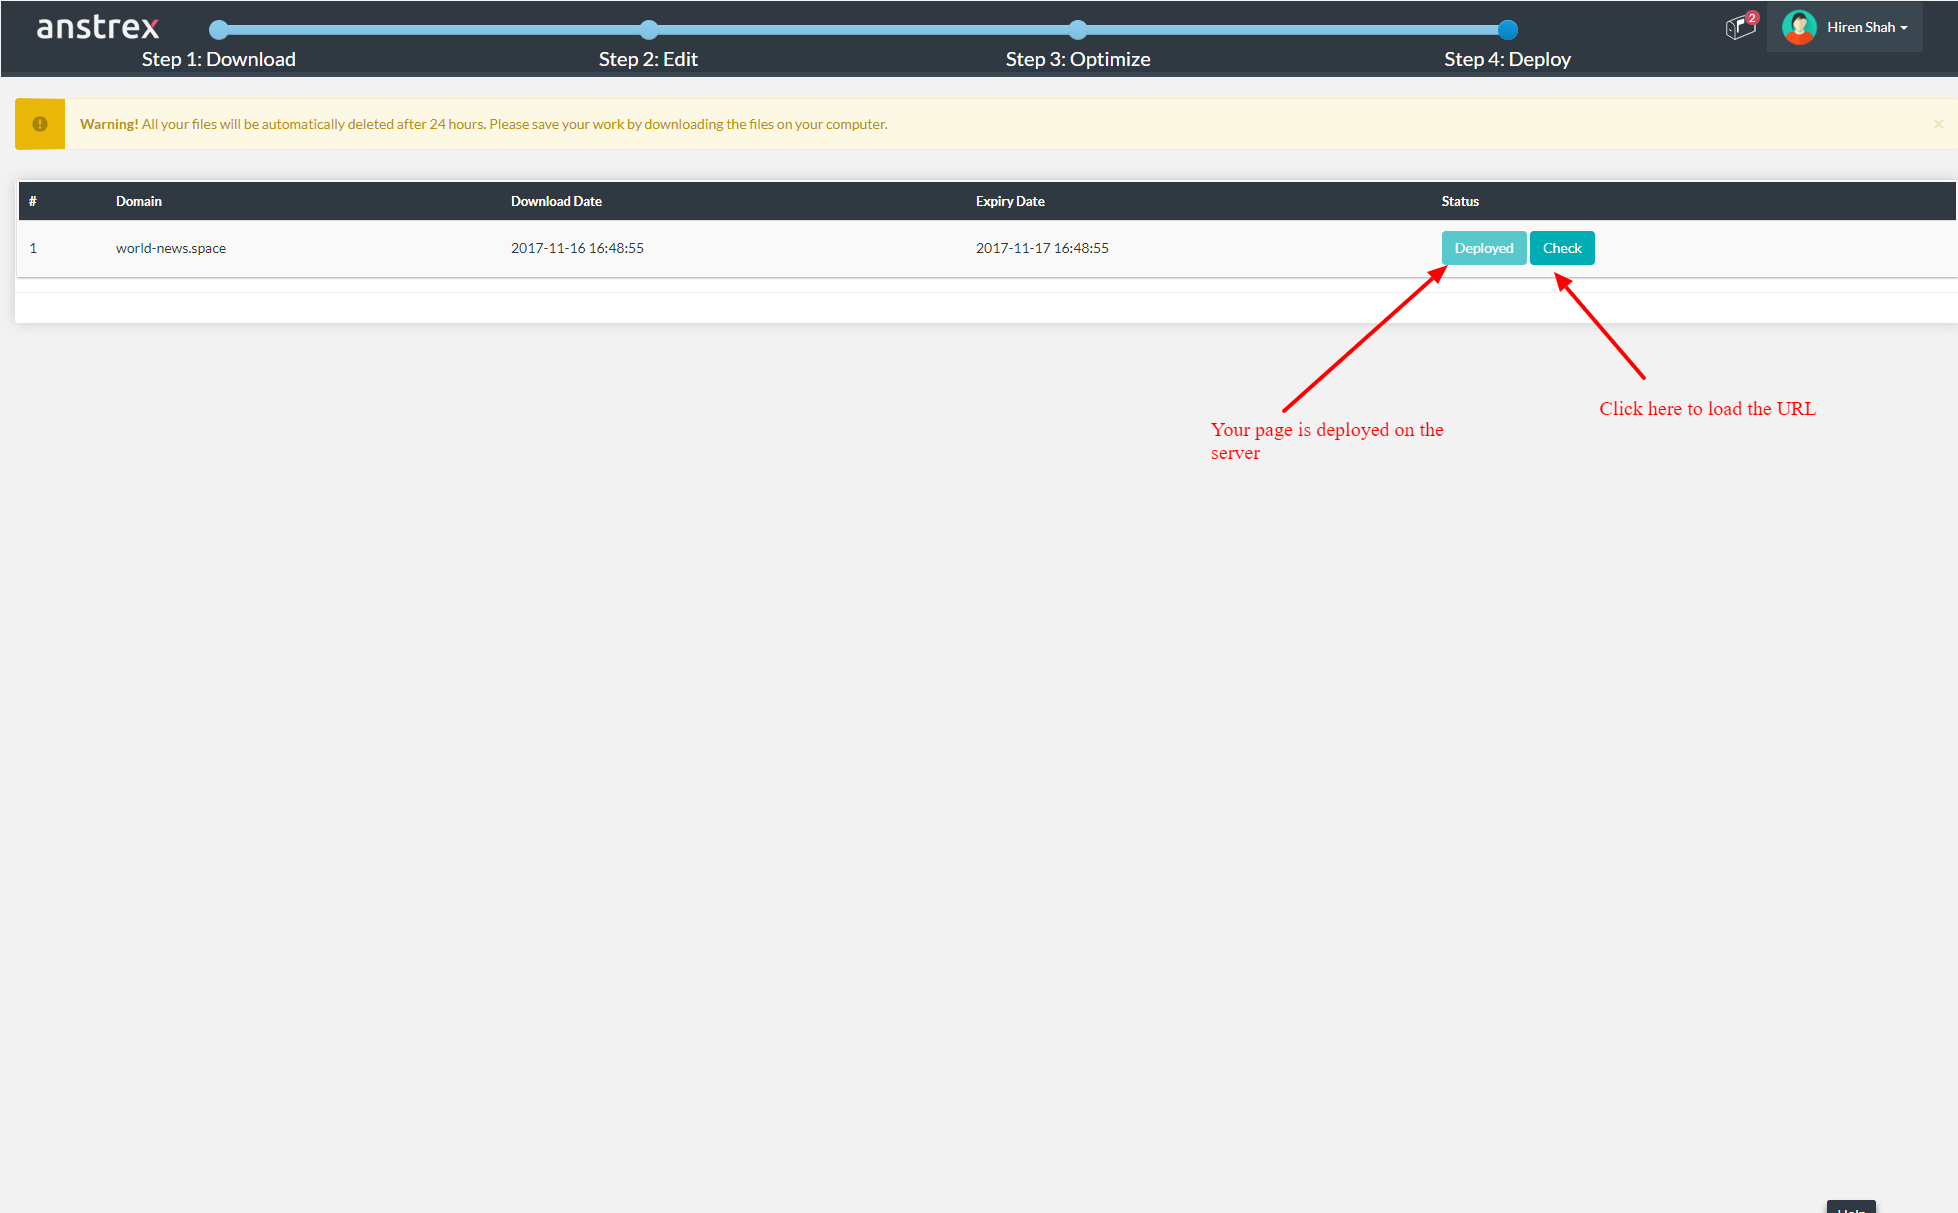
- After the page is deployed on the server, you will see a Check button that will open a new tab on the browser and show you the active URL of the recently uploaded page.