Introduction
In the previous article we reviewed the basic layout and functionality of the product management tool. In addition, we also reviewed on how to create and manage product boards to further organize and categorize various products.
In this article, we will review the process of managing individual product using Anstrex platform.
Getting Started
To manage any individual product from Anstrex Dropship platform, you will need to:

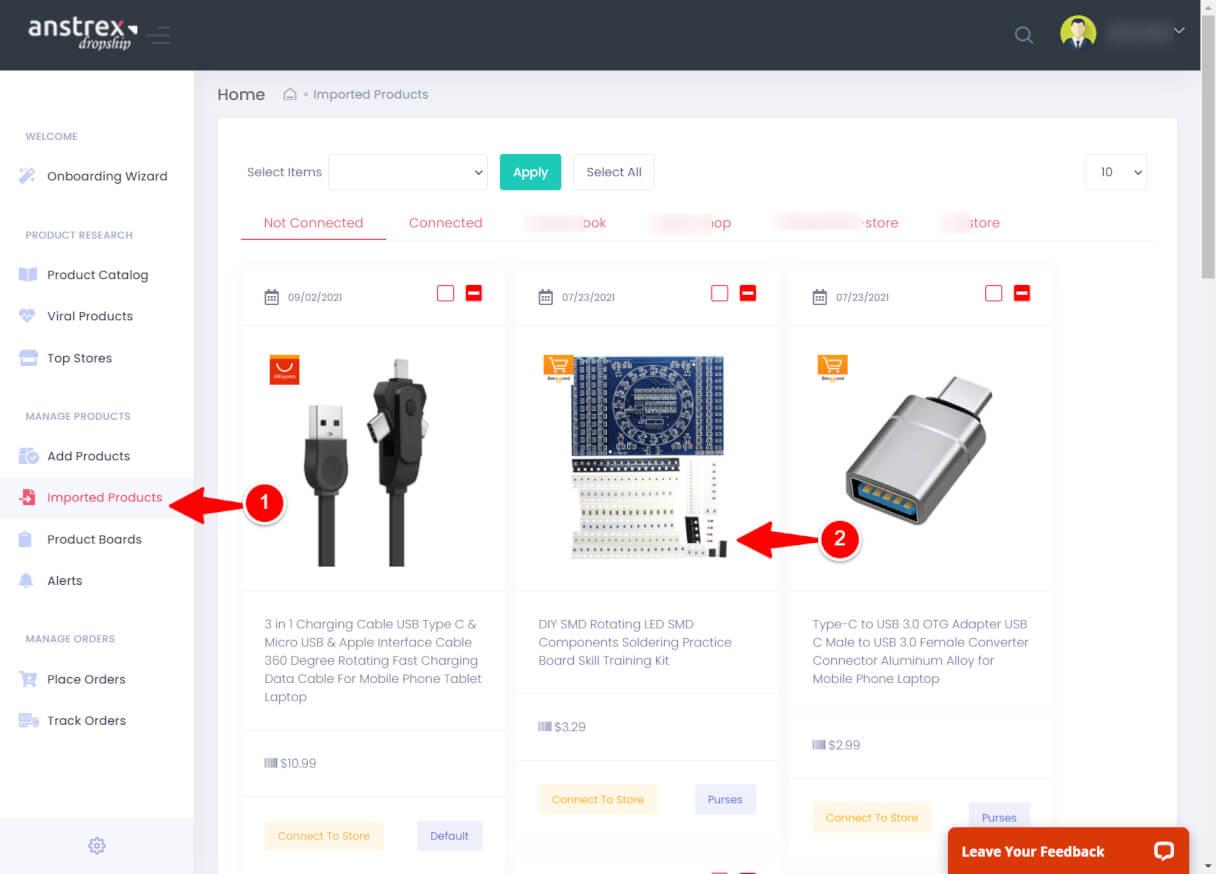
- Go to product management tool by clicking on Imported Items on the left hand sidebar menu
- Click on any individual product to see detailed view of the product itself which allows you to manage various aspects of the product.
Please note that product imported via Anstrex Chrome Extension are visible here.
Clicking on the individual product leads to a multi-tabbed product detailed view. Each of the tabs and the functions within them are defined as follows.
Edit Tab
The edit tab allows you edit all aspects of any given product. If the product is linked to a store, the changes are also reflected in the corresponding product properties of the store immediately upon saving. If the product is not linked to any store, the changes are saved within Anstrex platform and modified product can later be pushed to the store of your choice.
Below is the screenshot and various important functions of this tab:
- Tab Bar: This allows you to switch between various tabs which are described in this article. We are currently describing important aspects of Edit tab which allows you edit all the important properties of the product itself
- Product Title: This field allows you to alter the title of the product
- Product Prices: You can edit both the selling price and compare at price here.
- Type: This defines the product category. Usually, Anstrex imports the category from the supplier site and populates this field. However, you can edit this per your requirement. Vendor: Name of the vendor within the supplier site. This is for internal use mostly and does not require any changes.
- Custom Tags: Here you can apply custom tags to this product. Please make sure that you hit <ENTER> key on your keyboard after every tag so that the system recognizes it as a tag.
- Remove Tags Button: This button removes all the tags
- Variants: This field lists all the variants for the product. You can easily add/remove variants and variant type using the provided buttons. Please review the following information for additional details on this feature.
- Adding Variant Type: Variant type is an attribute of the product such as color, size, shape etc. You can create additional variant types besides the ones already available by clicking on the button "Add Variant Type" as shown in the screenshot below
 When you click this button, you will be able to create a new variant type
1. Provide a variant type
2. Enter the actual variants for the above variant type. Please make sure that you hit key on your keyboard after every variant so that the system recognizes it as a variant
3. Save the variant type/variants by clicking on the green button - Adding Variants: Adding a variant for any existing variant type can be accomplished by typing a variant name and hitting <ENTER> key on your keyboard as shown below.

- Removing Variants: You can remove any variant by clicking on the (X) button as shown below

- Removing Variant Type: You can remove any variant by clicking on the following button. Please note that removing a variant type will remove all the variants under that variant type.

- Adding Variant Type: Variant type is an attribute of the product such as color, size, shape etc. You can create additional variant types besides the ones already available by clicking on the button "Add Variant Type" as shown in the screenshot below
- Please make sure that you hit key on your keyboard after every variant so that the system recognizes it as a variant.
- Edit Item Description: Rich text editor that allows you to edit the item description
- Manage Item Images: This section allows you to add, delete, edit and download images. Our built in image editor has many powerful features including background removal.
- Select Board: Here you can assign the product to any of the custom board that you have created.
- Select Store: This dropdown menu allows you to select any of the linked store. Subsequent clicking on Send To Store button, will send the product to the specific store defined here
- Save For Later: This button saves all the changes you made to the product without sending it to the store
- Send To Store: This button sends the modification to the store and saves the product changes Anstrex platform.
Original Tab
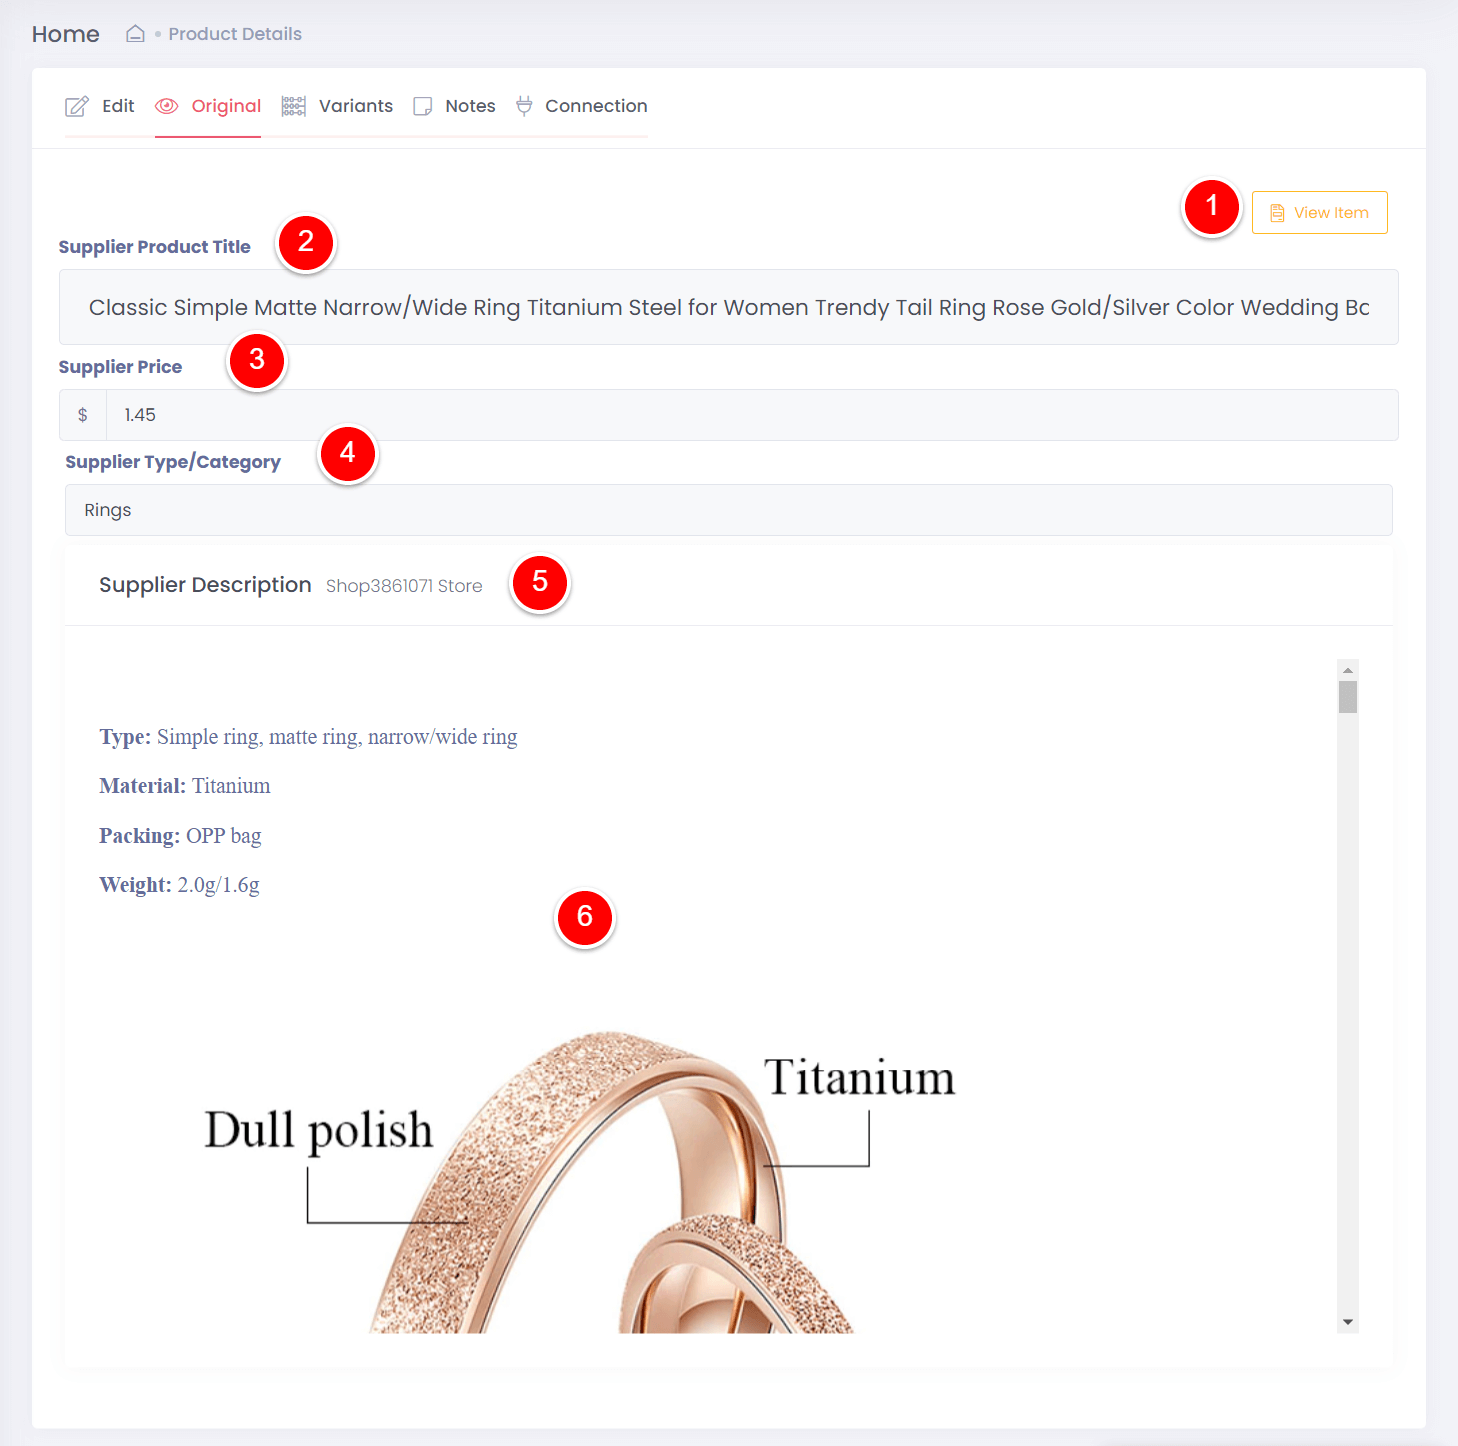
The contents of this tab is as shown below
This tab is only for reference purpose and preserves original item attributes when the product was originally imported for the first time. The following attributes are preserved
- View Item Button: This field preserves the link to the supplier site
- Supplier Product Title
- Supplier Price
- Supplier Category or Supplier Product Type
- Supplier Vendor Name
- Supplier Description
Variant Tab
This tab lists all the available variant for the product in easy to read tabular format as shown below
You can sort each table column as well.
Notes Tab
This tab allows you store custom private notes about the product for reference.
It has a rich text editor to create notes with hyperlinks, images, font styling etc.
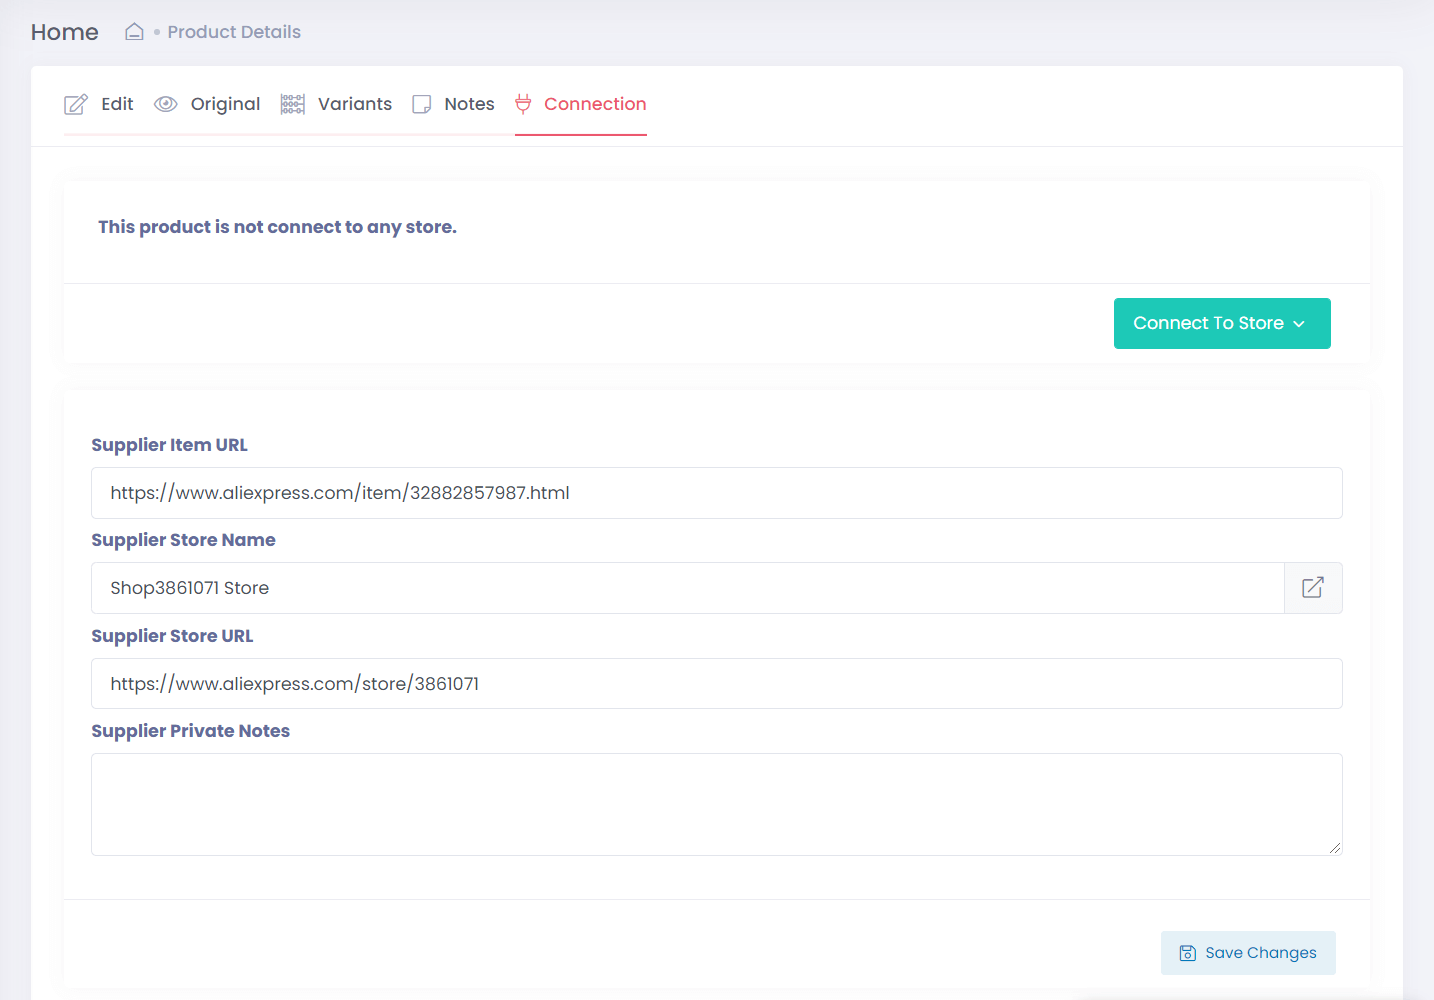
Connection Tab
This tab maintains the connection parameters of the product to the supplier site. This does not require any changes. In rare cases, you may have a need for this. But generally speaking any changes to this tab should be avoided as it may break order placement and alert functions.
Summary
In this article, we reviewed all the important aspects related to individual product and how you can manage those using Anstrex. You have the option to store this data locally as well as send it to the store directly.


