Please also watch our video tutorial covering Settings and Anstrex Dropship Configuration.
Introduction
As with any product that is as complex as Anstrex Dropship, there is no "One Size Fits All" solution. Hence, we have a number of different controls available at your disposal to customize the product to your needs. These controls are all conveniently grouped in our Settings screen.
Invoking the Settings Screen
You can pretty much invoke the settings screen from anywhere within the Anstrex Dropship platform by clicking on the gear icon located at the bottom of the sidebar as shown below:
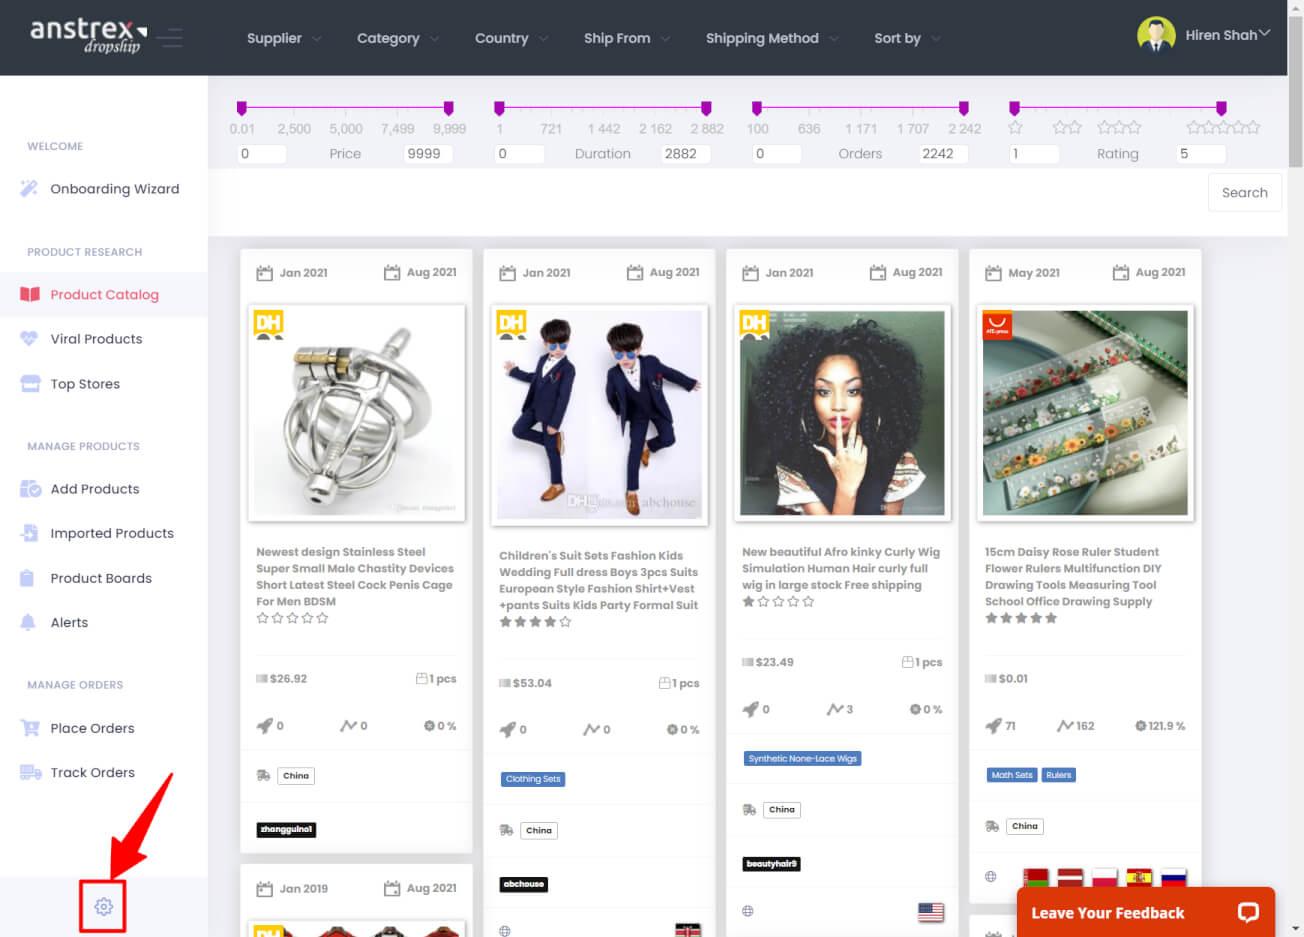
Invoke the Settings Screen By Clicking On the Gear Icon
Clicking on the gear icon, will take you to settings screen which shows all the Anstrex Dropship settings grouped under several tabs as described below:
Stores Tab
As the name suggests, this tab lists all your dropshipping stores connected to Anstrex platform as shown below:

Stores Tab - Settings Screen
Here you will have the option to either Add new stores or Disconnect/Uninstall existing stores from Anstrex Dropship. Please keep in mind that when you install Anstrex Shopify App into your store, your store will automatically get added to our platform.
Products Tab
Products tab is divided into two sections.
- Board Settings: This will control the behavior when the product is stored at the product board level.
- Stores Settings: This will control the behavior when the product is sent to your store either from our chrome extension or from our platform.
Let's look at the various controls available on this tab:
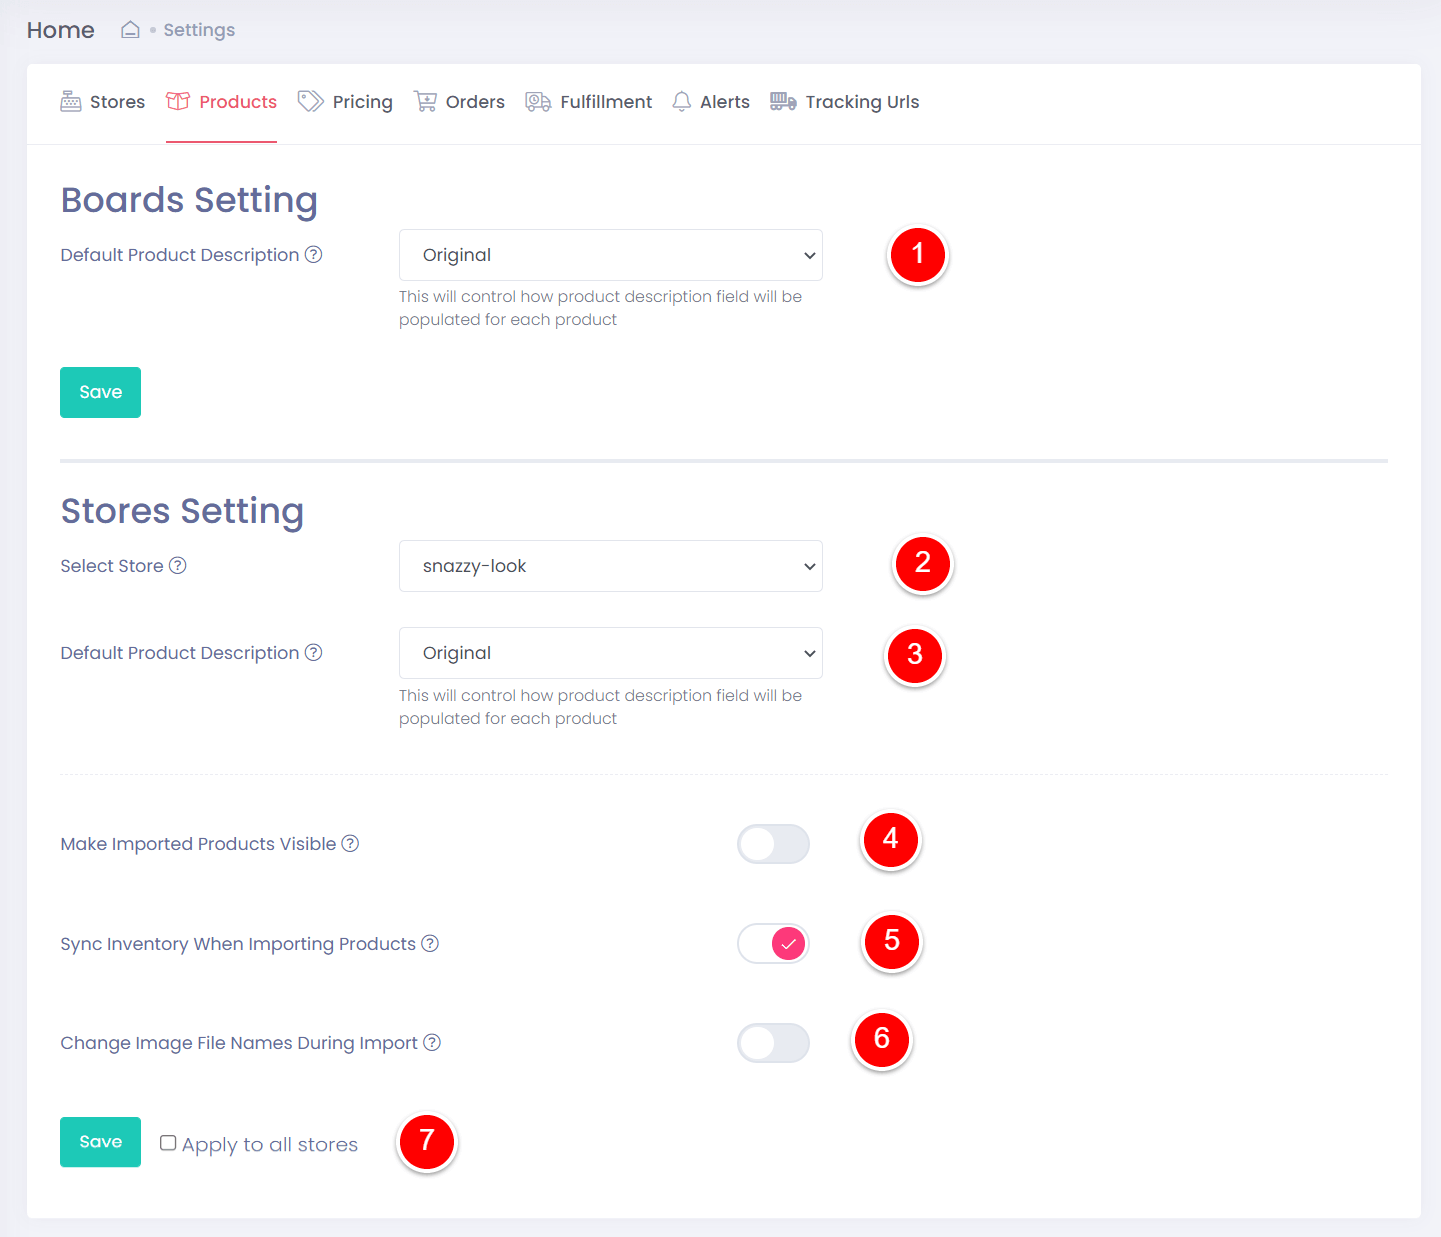
Products Tab - Settings Screen
Let's look at various controls available on this tab as annotated on the screenshot above
- Product Description At Product Board Level: You have 3 available options to define the product description when you import the product into a board
- Original (Default): This will import the original product description scraped from the supplier site.
- Custom: This will allow you to create customized description for each of the item you will be importing to product board. Selecting this option, opens a rich text editor as shown below with several custom tags available such as (title, type, price etc) which can be directly inserted into your product description. You can also insert custom images into your description.

- Empty: This will prevent description from being imported and will be left as blank.
- Select Store Dropdown: This dropdown allows you to select a connected store from the dropdown and all the subsequent settings will only apply to that particular store. This will give you maximum flexibility to customize the settings for each store on an individual basis
- Product Description At Store Level: You have 3 available options to define the product description when you import the product into a store (as selected in #2)
- Original (Default): This will import the original product description scraped from the supplier site.
- Custom: This will allow you to create customized description for each of the item you will be importing to product board. Selecting this option, opens a rich text editor as shown below with several custom tags available such as (title, type, price etc) which can be directly inserted into your product description. You can also insert custom images into your description.
- Empty: This will prevent description from being imported and will be left as blank.
- Make Imported Products Visible: This toggle switch controls whether a product you import to your store is made visible to the customer as soon as you import it. The default settings for this is Off which allows you to review the imported product into your store before you make it visible to your customer.
- Sync Inventory When Importing Products: This switch will control whether you want to sync the inventory (quantity for each product or product variant/sku) when importing the item into your store from a supplier site. The default settings for this is On.
- Change Image File Names During Import: If you wish to create unique filenames of the image files you import from a supplier site, please turn this toggle switch to On position. Default is Off.
- Save Button: Save button to save all your settings. You also have a checkbox here to conveniently apply all the settings to all your stores.
Pricing Tab
This tab shows various finer controls over pricing of your imported items from a dropship suppliers. It has 4 different sections as shown below:

Pricing Tab - Settings Screen
- Select Store Dropdown: This dropdown allows you to select a connected store from the dropdown and all the subsequent settings will only apply to that particular store. This will give you maximum flexibility to customize the settings for each store on an individual basis.
- Simple Pricing Rules: Here you can define your Selling Price and your Compare At price using very simple rules as shown in the screenshot below:

You have 3 methods to calculate your selling price and compare at price- Multiplier: Here you can define a fixed multiplier that will multiply the supplier price (product cost) to this value and calculate your selling/compare-at price.
- Fixed Amount: This option determines your selling/compare-at price by incrementing the supplier price (product cost) by adding a fixed value as defined here.
- Percent: This option allows you to calculate your selling/compare-at price by applying a percent value to the supplier price (product cost)
- Advanced Pricing Rules: This option will allow you to apply even more complex pricing rules based on the product cost (supplier price) range as shown below
 As evident from the above screenshot, this is very similar to simple pricing calculator as described above but now you can apply these rules based on what the product cost value is. For example, in the above screenshot if the product cost (supplier price) is between $1-2, the rules will dictate that the selling price will be 4x and Compare at price will be at 6x and so on. Please note that Advanced Price Rules will always take precedence over simple price rules. If an advanced price rule is not found for a given product, simple price will automatically apply.
 - Cents Rules: This will allow you to control on how to adjust the cents values after the above pricing rules are applied as shown below

It is a normal practice in the United States and several other countries to keep the cents values at 99 to maximize the margin without changing the whole dollar value. You can either choose 99 or any other value of your liking. You will also have the option to apply the cents rules to either Selling Price or Compare At Price or both.
Orders Tab
This tab shows all the controls/settings related to orders as described below:

Orders Tab - Settings Screen
- Select Store Dropdown: This dropdown allows you to select a connected store from the dropdown and all the subsequent settings will only apply to that particular store. This will give you maximum flexibility to customize the settings for each store on an individual basis.
- Save Order ID to Your Order Notes: Turn On this switch, if you wish to save the supplier order ID to the order notes in Shopify (order store) for reference. Default is On
- Show High Risk Orders in Anstrex: If you're using Shopify Payments, enable this option to show the Fraud risk on orders page. Great to spot those high risk orders before you place them! Default is Off.
- Delayed Tracking Notification: If your supplier has not shipped the order within a certain number of days (as defined by you), you will get notified. Default is Off.
- Tags After Order Is Placed: The tags (comma separated) defined here will be placed to your store order after you place the order with the supplier.
- Tags After Tracking Number Added: The tags defined here are added after tracking number is added.
- Save Button: Save button to save all your settings.
Fulfillment Tab
Fulfillment tab controls the settings related to order fulfillment aspects as described below:

Fulfillment Tab - Settings Screen
- Select Store Dropdown: This dropdown allows you to select a connected store from the dropdown and all the subsequent settings will only apply to that particular store. This will give you maximum flexibility to customize the settings for each store on an individual basis.
- Send Shipping Confirmation: You have several options in this dropdown which controls how the customer is notified when the shipping occurs:
- Each: Each item is confirmed individually (default option)
- All: Confirmation is sent after all the items from the order are shipped
- Never: A shipping confirmation is never sent to the customer
- Order Phone Number: During the placement of the orders with supplier, a phone number is required. This phone number, generally speaking, should be the store owner's phone number. Here you can define your phone number and select "Override Customer's Number" radio box (default option) to achieve that. If you wish to supply your customer's number instead, select the "Use Customer's Number" radio button instead.
- Save Button: Save button to save all your settings.
Alerts Tab
Receiving regular alerts on various supplier related changes (such as price or inventory) is an important aspect of Anstrex Dropship. This tab controls the behavior of the Alerts tool as described below:

Alerts Tab - Settings Screen
- Select Store Dropdown: This dropdown allows you to select a connected store from the dropdown and all the subsequent settings will only apply to that particular store. This will give you maximum flexibility to customize the settings for each store on an individual basis.
- When a price increases by more than: If there is a price increase by a certain amount (percent or fixed value) at supplier site, what would you like to do? The available options are:
- Notify Me (You are notified by an email) (Default)
- Update the price in your store using Simple Pricing Rules as described above
- Update the price in your store using Advanced Pricing Rules as described above
- Update by the same amount. In other words, if the price increases by $1, your selling price would also increase by $1
- When a price decreases by more than: If there is a price decrease by a certain amount (percent or fixed value) at supplier site, what would you like to do? The available options are:
- Notify Me (You are notified by an email) (Default)
- Update the price in your store using Simple Pricing Rules as described above
- Update the price in your store using Advanced Pricing Rules as described above
- Update by the same amount. In other words, if the price decreases by $1, your selling price would also decrease by $1
- When a product is discontinued by the supplier: Often times, a product is no longer available on supplier site. In case of such a scenario, what would you like to do? The available options are:
- Notify me (You are notified by an email) (Default)
- Unpublish the product. This option removes the product from your store.
- Set quantity to zero: This means that the customer will not be able to order the particular item from your store.
- Do nothing.
- When a product variant is out of stock. In this case, the product itself is available but a variant or two are out of stock. For such a scenario, the available options are
- Notify me (You are notified by an email) (Default)
- Remove the variant. This option removes the particular variant from your store.
- Set quantity to zero: This means that the customer will not be able to order the particular variant from your store because the available inventory is set to zero.
- Do nothing.
- When a product inventory changes
- Notify me (You are notified by an email) (Default)
- Update the available inventory in your store
- Do nothing
- When a product inventory goes below a certain value (as defined by you), the available actions are
- Notify me (You are notified by an email) (Default)
- Do nothing
- Unpublish the product. This option removes the product from your store.
- Set quantity to zero: This means that the customer will not be able to order the particular item from your store.
- Save Button: Save button to save all your settings. You also have a checkbox here to conveniently apply all the settings to all your stores.
- Reset to Default: This button will reset all the settings to default values.
Tracking URLs Tab
If you are using a third-party service to provide shipment tracking URLs to your customers, you can define those URLs on this tab as shown below:
Tracking URLs Tab - Settings Screen
- Tracking URL: Here you can define a global tracking URL template for all the stores. Use the available tag {tracking_number} in your URL to replace the actual tracking number of the shipment. You can define more than one tracking template, if you are using more than one service by clicking on "Add Tracking URL" button.
- Here you can define the tracking URLs separately for each store, in case you are using multiple services. Use the available tag {tracking_number} in your URL to replace the actual tracking number of the shipment
Summary
In this article, we have discussed all the available settings for customizing the Anstrex Dropship behavior under various circumstances related to product additions, inventory management, pricing determination, placement of orders, order fulfillment and tracking and product alerts.